Rebuilding the Kingston 5 Ball Carburetor for your Model T Ford
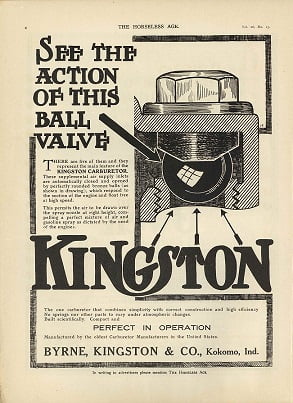
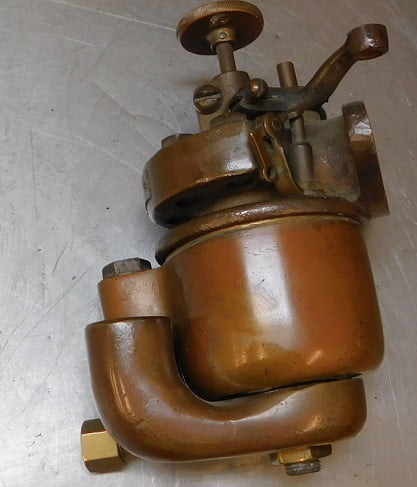
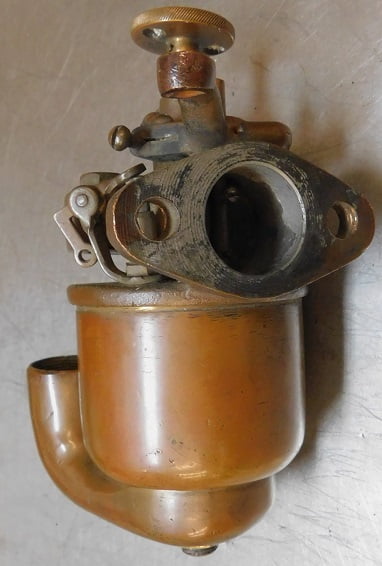
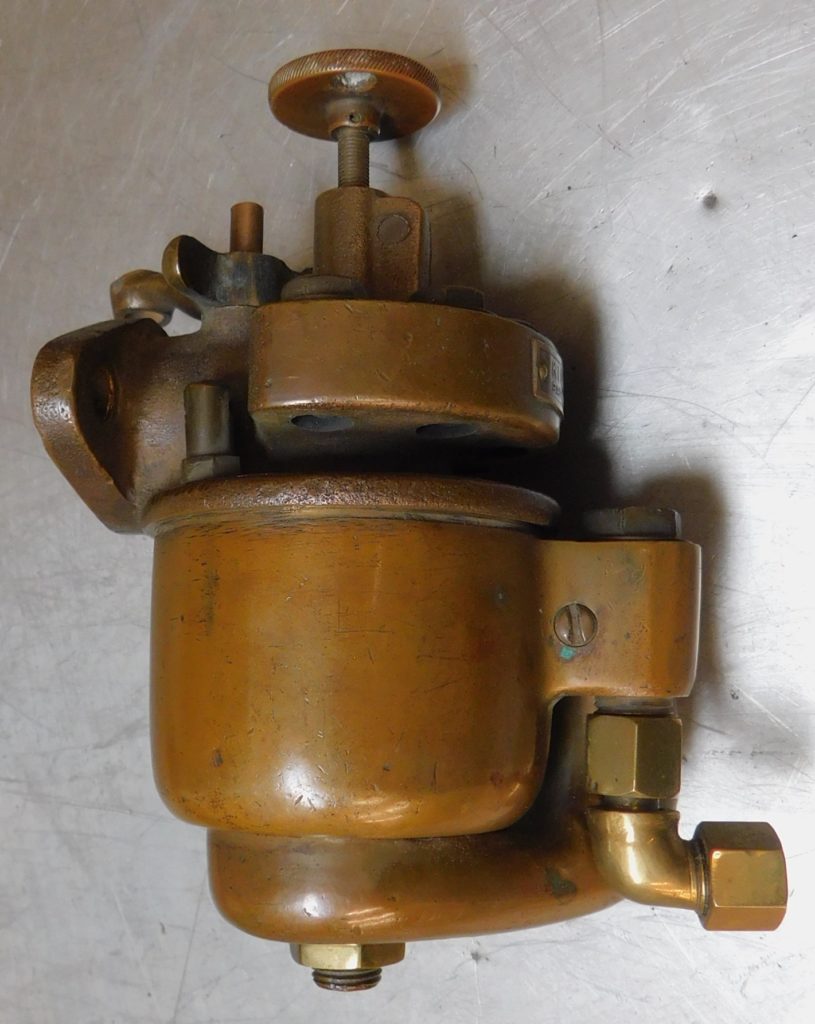
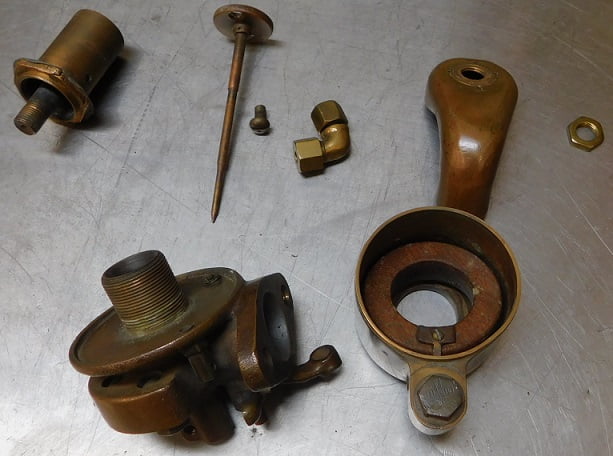
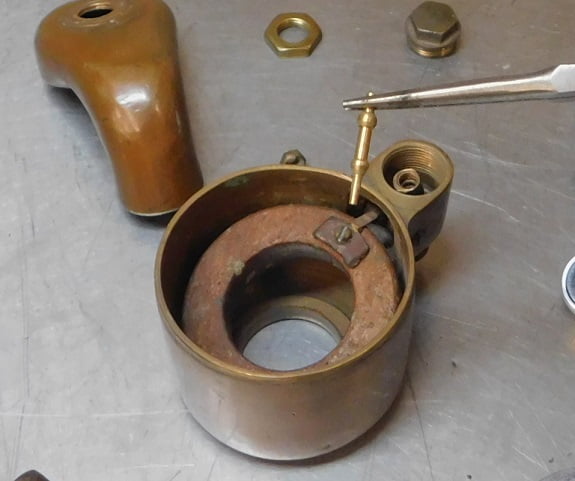
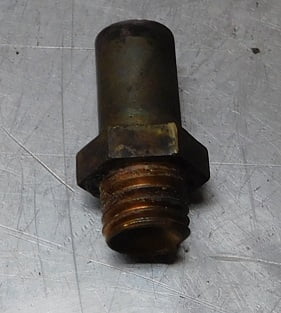
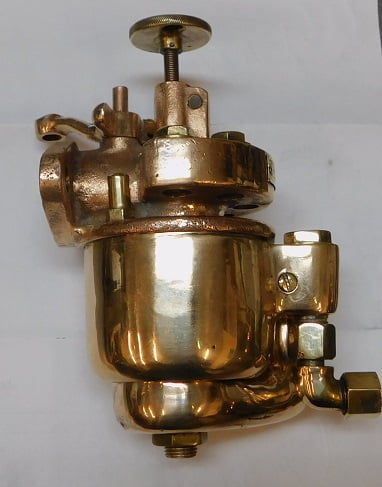
Kingston sold hundreds of thousands of five ball carburetors to all sorts of manufacturers. They were used on everything from tractors to motorcycles, boats, and stationary engines of all sizes. The carburetor in this illustration has a threaded inlet, so it is not for a Model T Ford.
The earliest Model T Fords used the Kingston 5 Ball Carburetor. By all accounts the performance was and is great with the Kingston 5 Ball. A few Model T’s in 1909 also were produced using another type of carburetor made by Buffalo, but those carburetors are seldom seen today, and Ford did not use many. The Kingston 5 Ball is a very simple and sturdy all brass / bronze design. The five balls provide a secondary, on – demand air supply for the carburetor. As engine speed increases the decreased air pressure above the balls causes them to lift off their seats as needed by engine demand. One, some, or all of the balls might lift depending on airflow. This makes the carburetor very efficient and helps to eliminate flat spots with various throttle openings. Read on and we will see how to rebuild this carburetor.
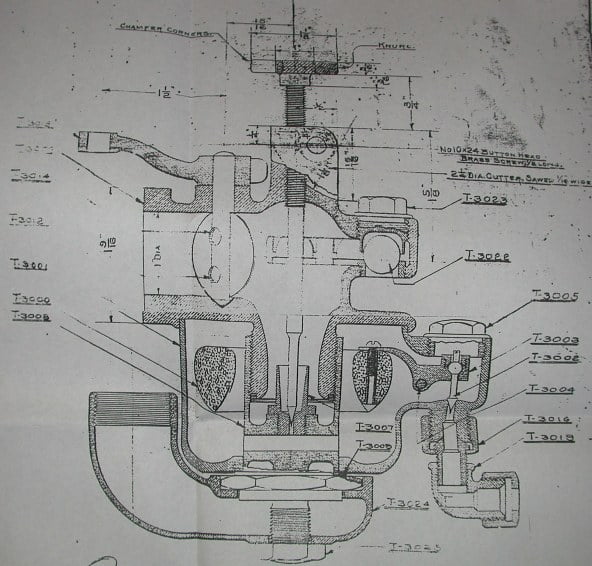
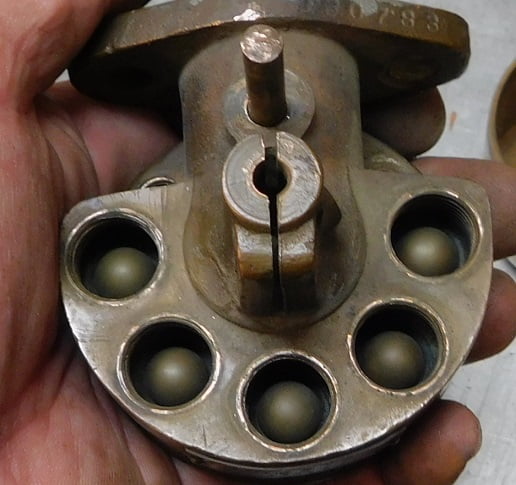
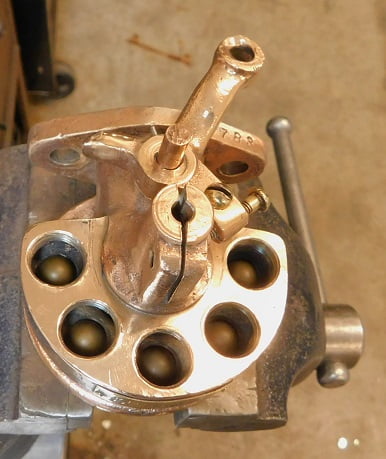
Cutaway diagram shows the “scalloped” cap above each ball. The caps are cut away so that air flows in the proper direction towards the carburetor butterfly. The caps are specific to each location and should be kept in order so they can be reinstalled in their correct locations after cleaning.
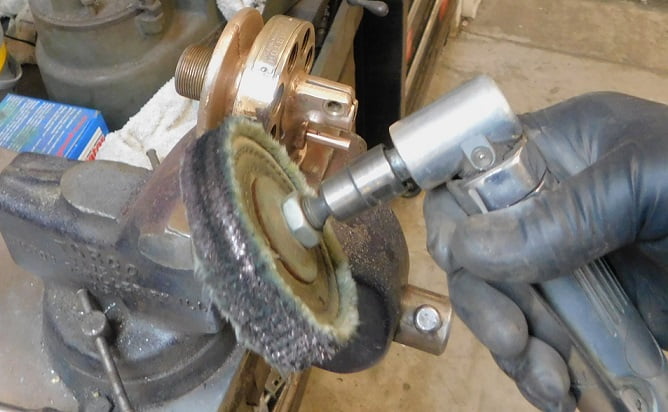
Rebuilding the Kingston 5 Ball is very much like rebuilding any early carburetor. Most of the time spent is cleaning and polishing. There are a few specific things to pay particular attention to. The balls need to be carefully inspected for diameter and their seats need to be concave and conform to the diameter of the balls. We looked at all these things in our specimen and found virtually no appreciable wear, just lots of dirt and corrosion. Parts are somewhat available if you want to buy extra carburetors and don’t mind spending hundreds of dollars. There are seemingly always pipe thread inlet 5 Ball carburetors for sale on eBay that came on other brands of automobile (Brush is one brand) or boat engines. They typically sell for a fraction of the price of a Model T Ford 5 ball. Which is to say hundreds of dollars versus thousands of dollars.
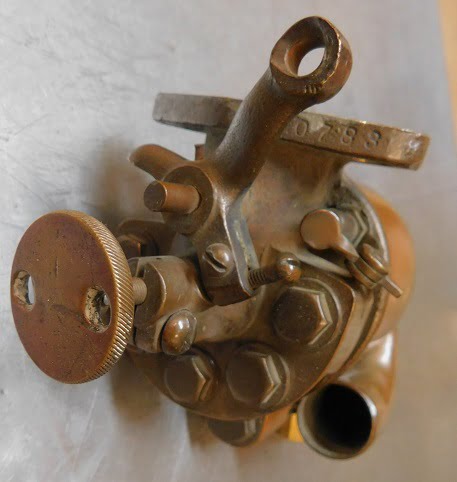
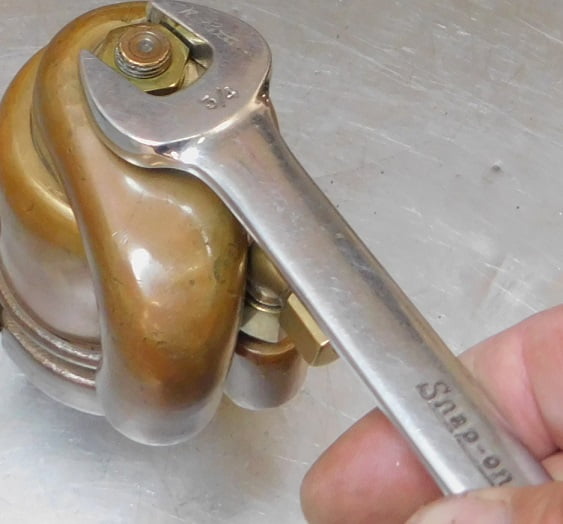
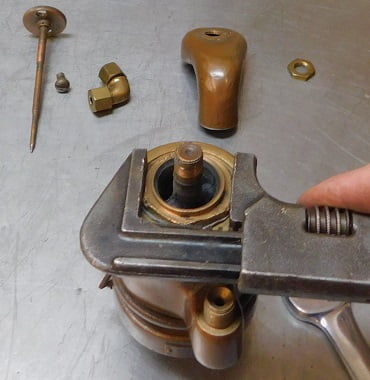
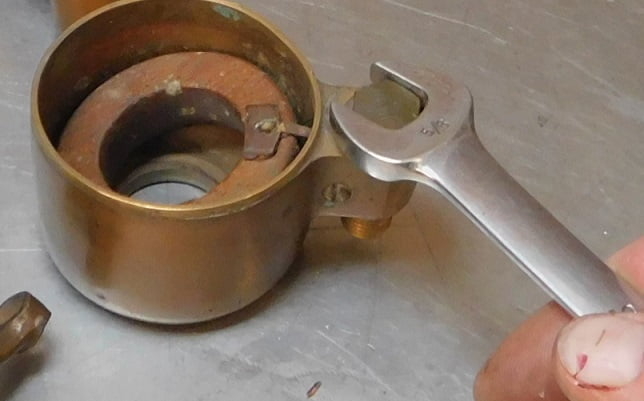
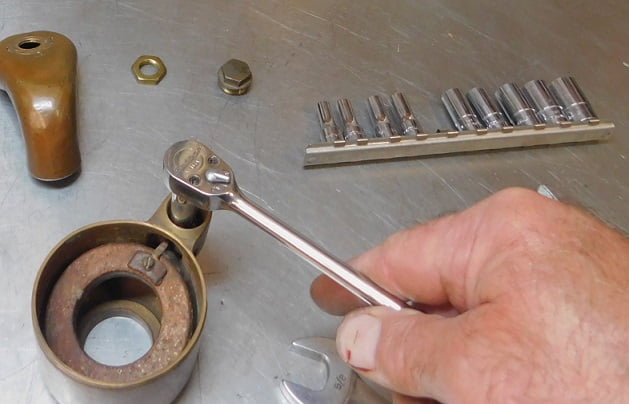
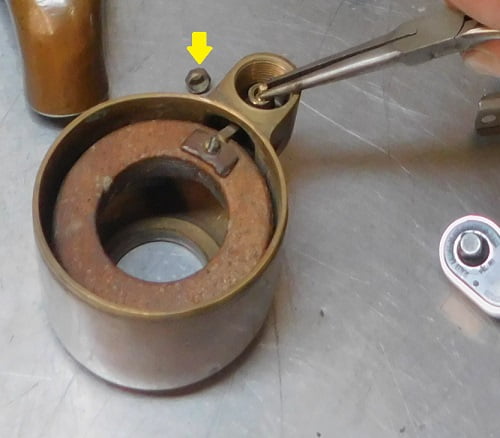
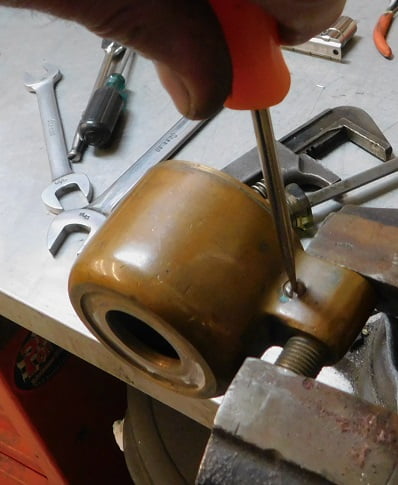
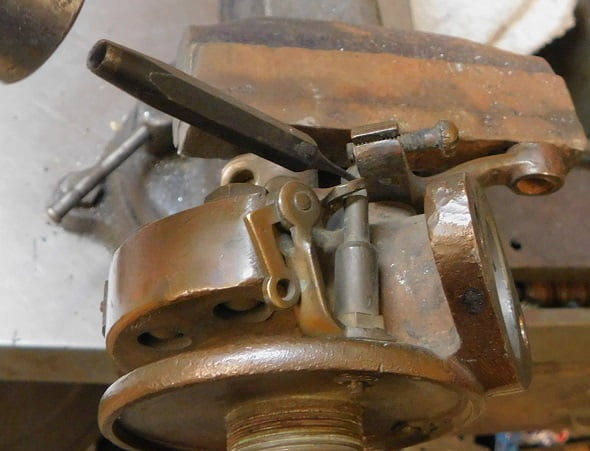
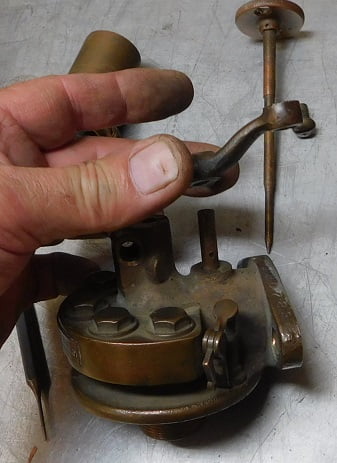
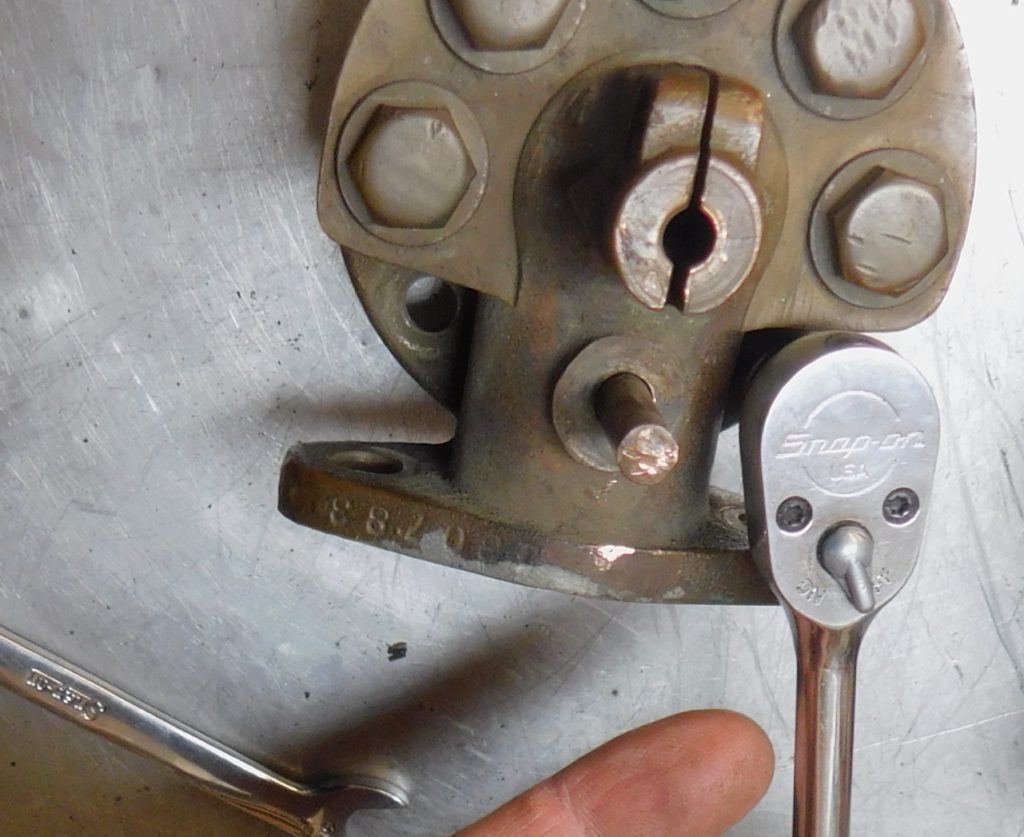
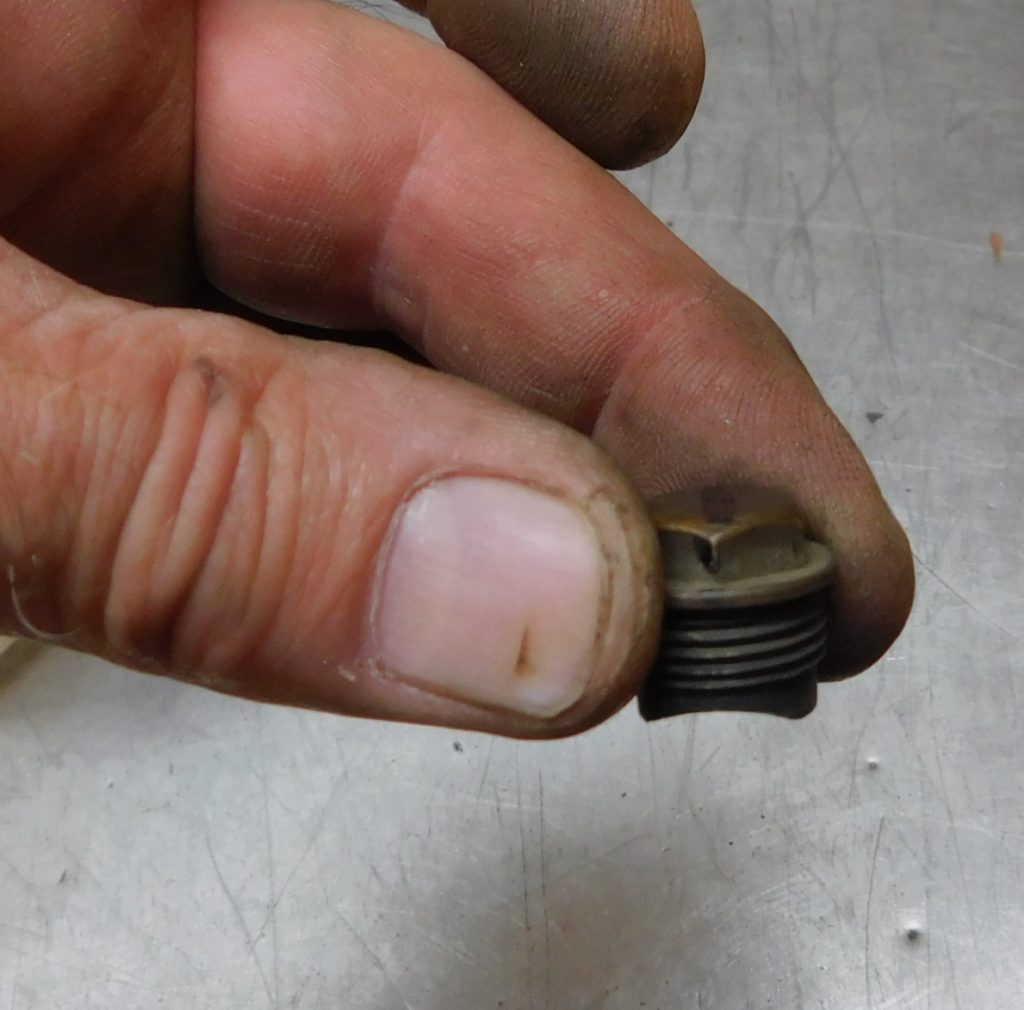
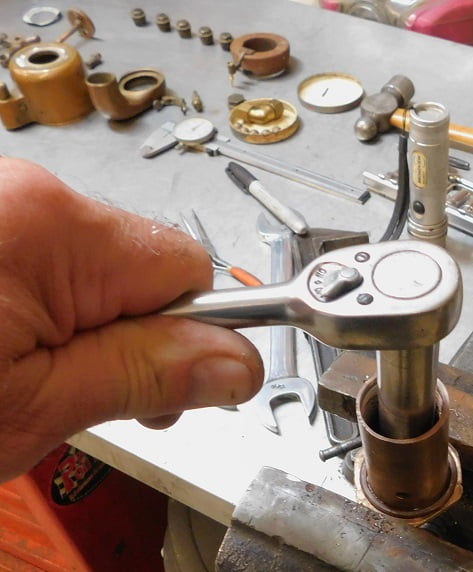
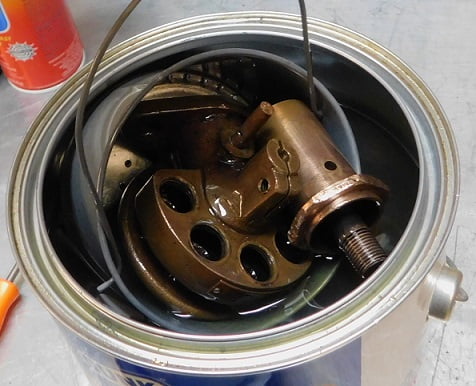
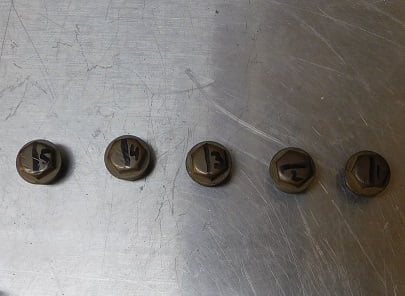
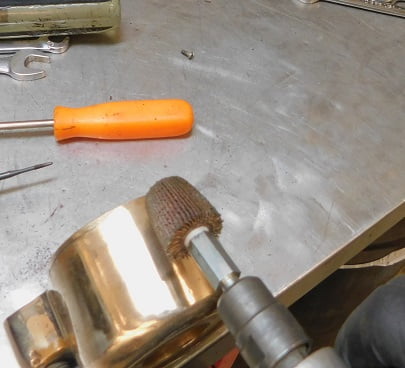
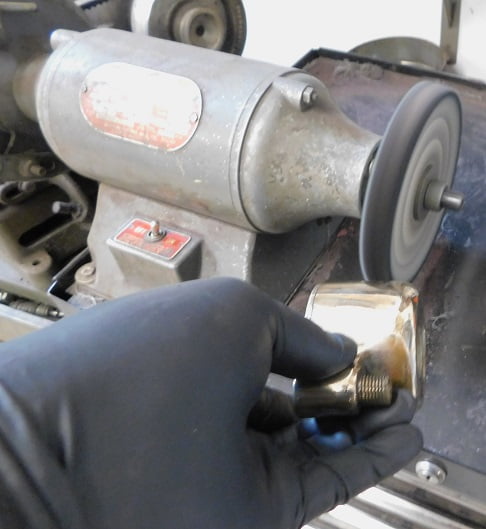
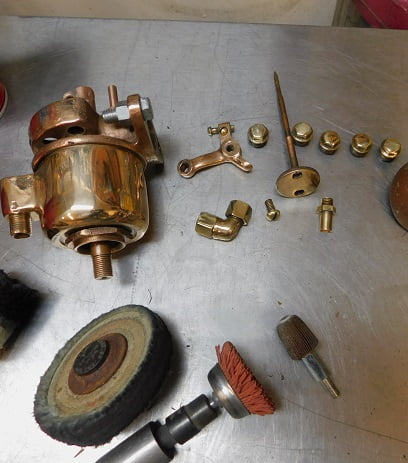
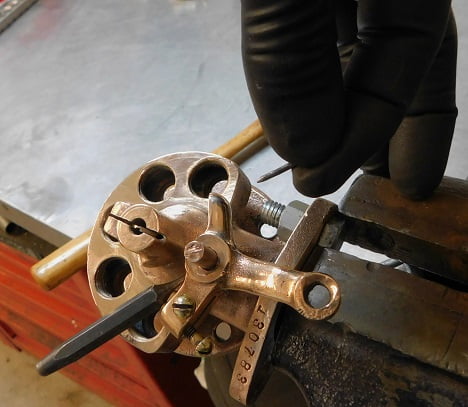
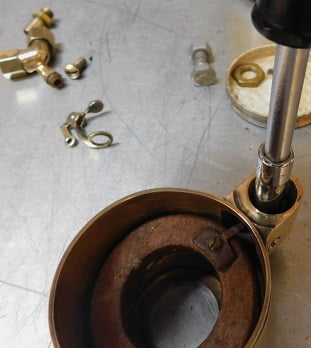
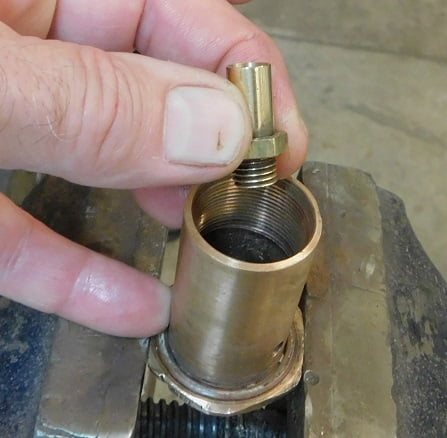
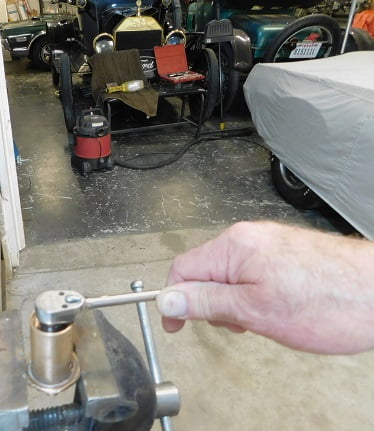
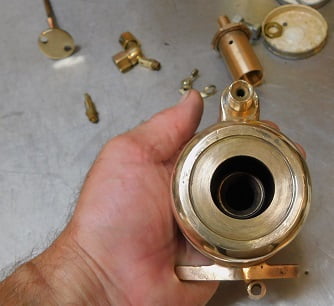
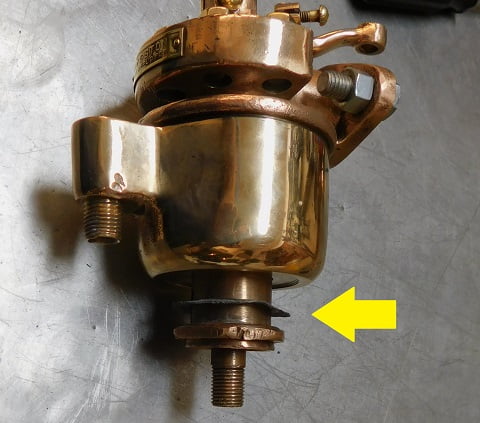
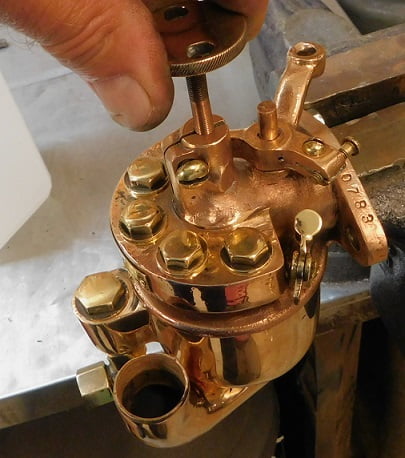
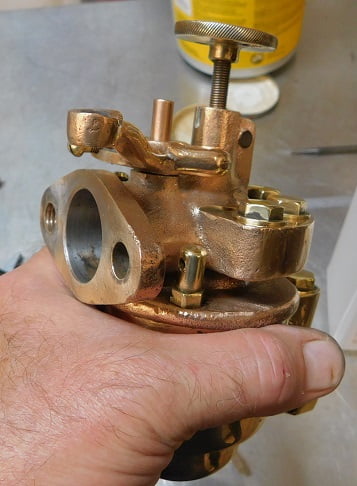
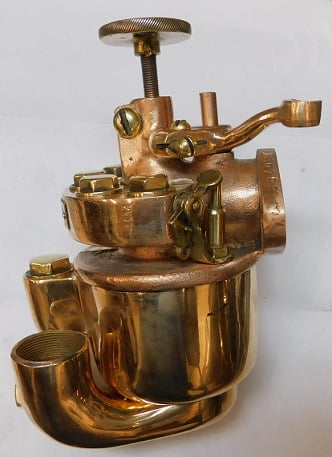
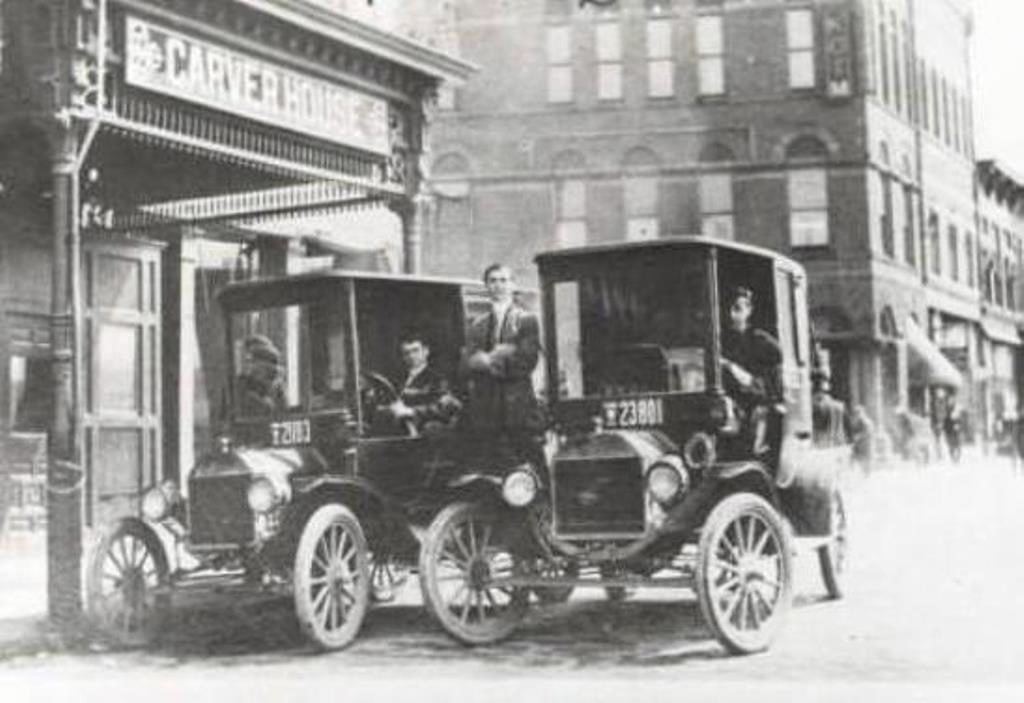
Ford factory drawing showing a cutaway of the Kingston 5 Ball. The earliest carburetors have no provision for a choke. The inlet air horn can be positioned in a variety of places, it is shown in a position that would not work on a Model T.We always take a lot of pictures before disassembly. The “tickler” button can be seen just to the rear of the carburetor mounting flange. In cold weather the button is depressed to enrich the fuel / air mixture. When the button is depressed it pushes the float down, causing the carburetor to flood. The excess fuel raises the float level giving a higher concentration of fuel.On the opposite side of the carburetor is a fitting that somewhat resembles the tickler button. It is actually a bowl vent.Kingston serialized all of its carburetors in the Model T era. You can see the serial number stamped on top of the mounting flange.We start disassembly by removing the nut securing the air horn to the bottom of the carburetor.Most of us do not own a 1-9/16″ socket. Fortunately a Ford wrench goes that big.The float bowl has some black crud in the bottom and the main jet area is coated in black residue, but overall this is a great looking carburetor.Removing the cap allows access to the float hinge and fuel inlet valve. A 5/16″ nut captures the inlet valve stem. Loosen it carefully, if it is seized you can easily break the float hinge. Then you get to make a new one which can be time consuming!The inlet valve stem can be carefully removed.Notice the valve stem is shaped differently at the bottom compared to the top. It won’t work properly if installed upside down.At this point we clamp the carburetor bowl in the vice so that a lot of pressure can be placed on the screwdriver when removing the float hinge.We left the throttle butterfly intact and drove out the pin securing the throttle arm to the shaft using a 3/32″ pin punch.The tickler and bowl vent are removed for cleaning and polishing.We used a magic marker to note the position of each of the ball caps. They will be kept in order throughout the process.See how the bottom is scalloped to allow air to flow in the proper direction?The five balls are removed for cleaning.The main jet comes out using a 1/2″ deep socket.The main jet is caked with fuel residue inside and out.All of the parts do not fit in the solvent basket so they are cleaned in batches.Over the past 100 + years carburetor repairmen have scratched various symbols on each of the ball caps. We will sand off all the marks and polish each one individually so that they will stay in order.It takes a lot of time and patience to polish each component. Each little scratch or dent is removed carefully using a variety of tools and methods. A lot of the work is done with sanding rolls in a high speed angle motor. Once the big areas are free from dents and scratches it is time to use progressively finer sandpaper, going from 400 to 600 and finally 800 grit before polishing.Lots of polishing is done using air powered tools and jeweler’s rouge in various colors.The bench buffer is used on some of the components, it has a 6″ sisal wheel.We are about 2/3 done with polishing after two full days in the shop. The workbench gets cleaned repeatedly as it is covered by black dust and bits of cotton from all the polishing. We wear rubber gloves and a full face shield for protection.With everything cleaned and polished we can begin reassembly. A bolt and nut installed in the inlet flange allows the pretty carburetor to be clamped in the vice without causing nicks and scratches. The throttle pin is ground to a slight taper on one end to make it easier to install.The balls were checked with a caliper to ensure they are round. Then dropped in place for final assembly. The original float looks pristine. We are re – using it. There is a brass float commercially available that works nicely if the float needs to be replaced.The hinge pin is installed, then the fuel inlet valve pin is dropped in place, and secured by the nut.The main jet is installed for the final time.The float bowl has no gasket at the top, it is a precision fit to the carburetor body. The fuel inlet is located 180 degrees from the mounting flange.The lower jet section of the carburetor is threaded in place. The arrow is highlighting the location of a 1/64″ lead gasket that prevents gasoline leakage from the float bowl.The mixture needle is turned in until it just contacts the jet, then backed off one turn. Then the tension screw is tightened until resistance can be felt.The tickler and the bowl vent are installed. Kingston eliminated the bowl vent before the end of 1909, many of these carburetors do not have one. Apparently it was not needed.The carburetor is ready for installation on S/N 22.We expect it will perform well.The 1910 – 1911 Kingston 5 Ball carburetor is exactly the same as earlier versions except that a choke was added, and the air horn is now at a 45 degree angle. Repair and maintenance is just like the early version. The Carver House Hotel still stands today in Warren, Pennsylvania where these two 1912 town car taxis await paying fares.