Installing a Winfield Updraft Carburetor on your Model T Ford
The man himself – Ed Winfield. A large Winfield carburetor can be seen in the hood cutout. This racer featured one of Ed’s infamous “Two up – two down” Model T Ford engines with a crankshaft, camshaft, cylinder head, intake and exhaust all designed and built by the master of speed. Photo from about 1928.
We have long been fans of Winfield carburetors for Model T Fords. There were many designs offered by Winfield over the years. Some are updraft, some down draft, some side draft. In this article we focus on installing an up draft Winfield designed for improved T performance.
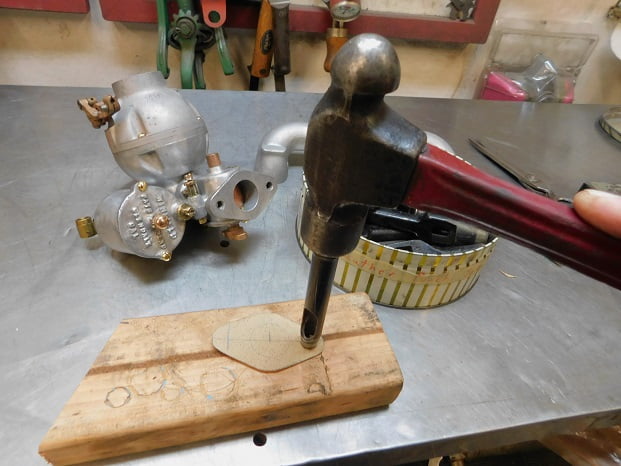
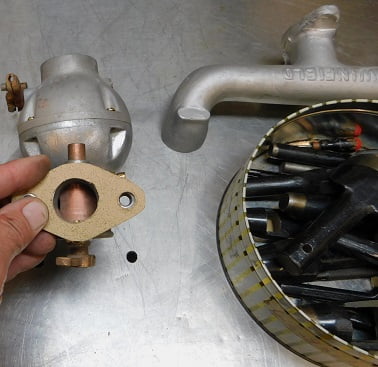
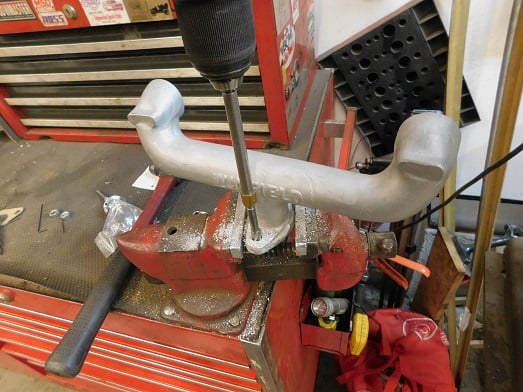
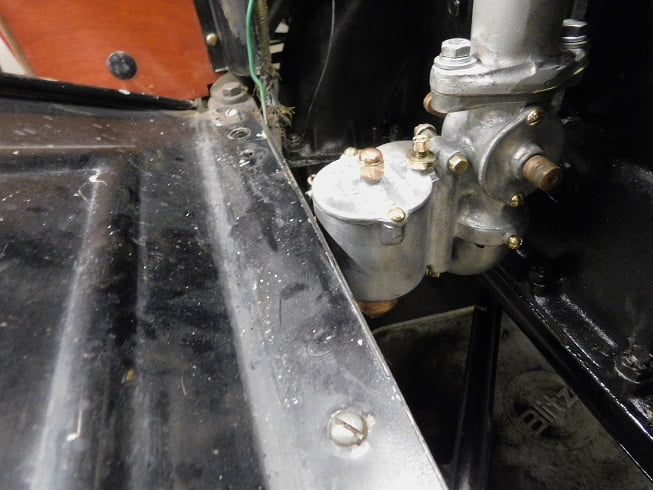
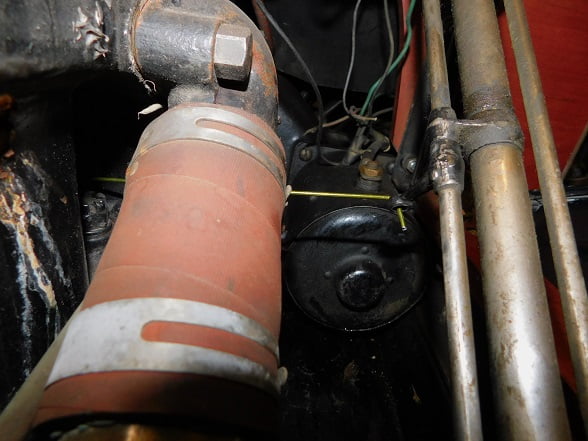
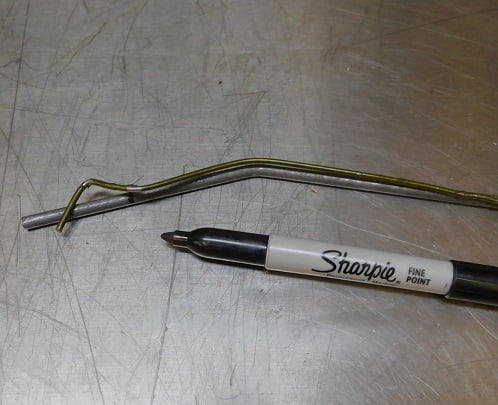
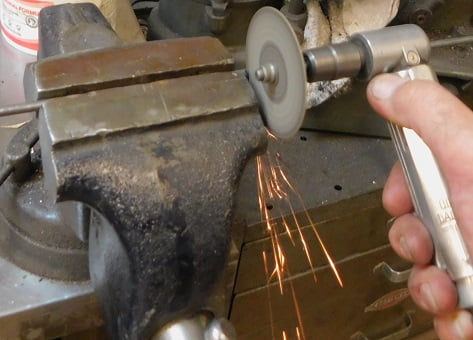
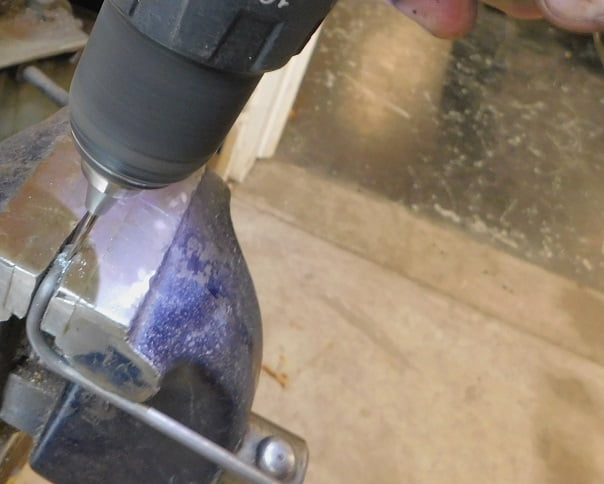
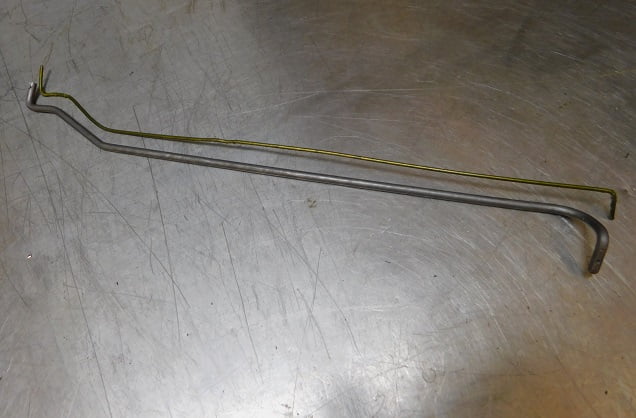
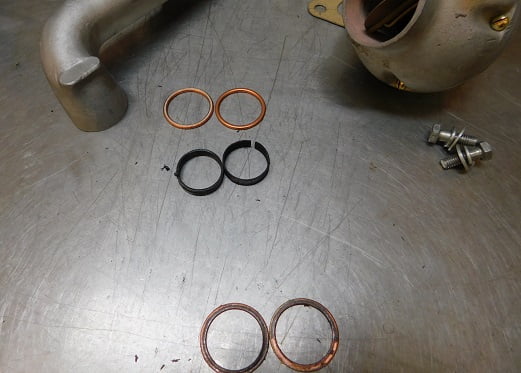
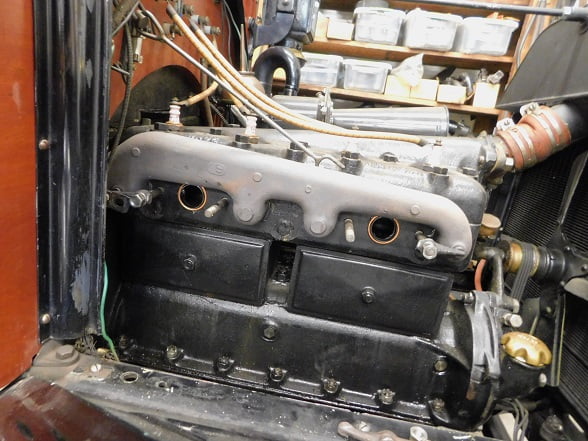
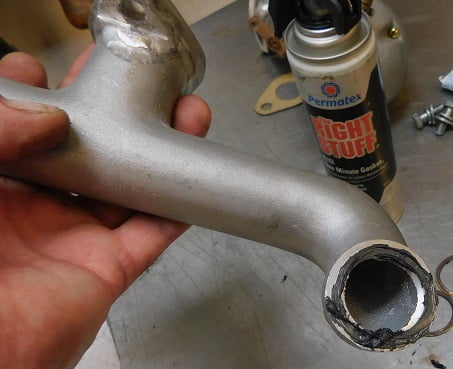
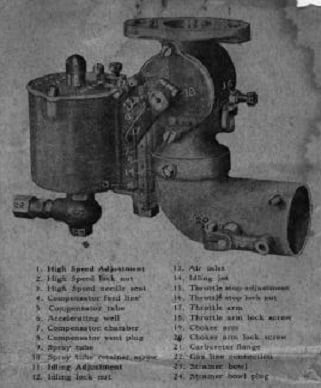
Winfield carburetors ruled racing, particularly at Indianapolis and on the west coast oval courses. The carburetor in this image has a choke assembly that does not have a silencer. The choke assembly can be removed and replaced as a unit independent of the carburetor itself. Winfield made and sold various choke assemblies and throttle arms to allow for all sorts of applications. Without the silencer the Winfield carburetors are known for a hissing sound at part throttle. This is not a problem in race cars but can be annoying in a street driven car with muffled exhaust.Our subject carburetor has a 1 1/8″ throttle bore size and the silencer style choke assembly. We have been collecting enough parts to build this carburetor for several years, starting with only a filthy corroded main body in 2015. Every part of this carburetor (other than some of the screws) is either an original one or made from scratch. There are zero new parts available for Winfield carburetors.A nice reproduction Winfield updraft intake manifold is available.We bought the intake from Chaffin’s Model T Parts. The hole pattern was not a match for our carburetor so a friend welded up the holes using his MIG welder.This is a reference photo for those unfamiliar with these carburetors. The yellow arrows represent the approximate relationship between the carburetor and the Model T frame rail. We started by making a gasket for the carburetor. You will need gasket material, a way to cut it, and measuring / layout tools as shown.The outside of the gasket is cut out using scissors. The holes for the bolts are cut using a gasket punch set and a block of wood.The hole for the carburetor bore is carefully cut using an X-acto Knife.We checked the fit of our gasket, then used it to mark the bolt holes on the intake.The center of each bolt hole was drilled with a #40 AWG bit, then a 5/16″ spot facer mounted in a 1/4″ collet was used to cut the hole to finished dimension. Our vice has aluminum jaws to keep from damaging aluminum parts.The “before” picture shows our typical T engine. This one has a standard T cast iron intake and an NH “Straight Thru” carburetor.We start by turning off the gas at the sediment bulb under the car.Half clamps are used to keep the exhaust manifold in place while the intake is swapped. We removed the hood shelf too, and the engine pan. If you plan to use the silencer style choke on your Winfield it will require trimming the engine pan for clearance.We temporarily installed our intake / carburetor in order to figure out all the controls and the fuel line.We ended up having to rotate the choke ball to clear the engine. Fortunately the Winfield design makes this infinitely adjustable. Looking at the throttle, it appeared that we would have more room for the throttle rod if we moved the throttle arm to the rear of the carburetor, making it more in line with the opening in the center of the block.We used an old coat hanger to mock up the throttle rod.This is the driver side showing how the coat hanger wire fits the throttle arm.Bottom – top: Original throttle arm, coat hanger pattern wire, and a piece of 3/16″ mild steel stock from the local home improvement store.We decided to start in the middle and work towards the carburetor end first. The arrow indicates where we strike the 3/16″ steel stock with our ball peen hammer to create bends.After each bend is complete we mark the next one, bearing in mind that the bent piece will consume some of the material, so each bend is marked a little beyond where we expect to end up.We compare the bent coat hanger with the piece being bent as we go.With this end done we move to the steering column end next.We cut it off about where we think it will be just slightly more than enough material.This piece took us a couple hours to fabricate just because there are so many steps required. If you bend it sharply the wrong way it will likely snap off if you try to straighten it. So don’t do that! Take your time and think about it before each bend.We added a very large radius bend just at the steering column end. This will allow us to adjust the overall length easily without fear of snapping the rod. The ends are drilled for 1/16″ cotter pins.The finished throttle rod compared to the coat hanger wire template.We used another piece of coat hanger wire to help with the shape of the fuel tube needed to connect the Winfield carburetor to the existing fuel line. We are keeping a shutoff valve at the carburetor for convenience sake. A tube bender is used to bend 1/4″ cadmium plated automotive steel brake line. We are using standard brass compression fittings. Here’s the finished product. We are using the stainless steel ball valve which has machined Teflon internals for the shutoff valve. These come from the local Ace hardware store. The one in the picture is 1/8″ NPT on each end. You can also find these valves on Amazon under the Dernord brand name.We took apart the intake and carburetor for easier installation. A pair of new copper glands are used with the old steel rings. We took off the old glands (bottom) and tossed them. A bit of “The Right Stuff” is put on the area around each hole on the engine, then the rings and glands are put in place.A bit more “The Right Stuff” is smeared around each intake port before installation.A typical 9/16″ open end wrench is used to tighten the clamps in place which causes the copper glands to deform and create a good seal. Too much torque can crack the aluminum intake, so do not use a socket with breaker bar.You will want to hook up the choke cable before installing the carburetor because there is no way to do it once the carburetor is bolted in place. The frame rail is completely in the way.This is sort of illegible so I will point out the main adjustments in the next few images. The illustrated carburetor has a choke housing without the ball silencer.We tried various fittings for the fuel line. This did not end up being the final choice. This is the low speed mixture adjustment. It has a locking collar that must be loosened in order to adjust it. The adjuster and seat can be swapped if you want the adjustment to be positioned on the other side of the carburetor.This is the high speed fuel mixture adjustment. It also has a locking collar which must be loosened to allow adjustment. If you adjust this it will affect the idle adjustment. Often you will be going back and forth between the two until everything is satisfactory.The arrow is indicating the throttle stop, which is the idle adjustment. It has a lock nut which must be loosened in order to adjust idle speed. This is a really difficult thing to adjust with the carburetor installed. Thankfully you only need to do it once. We adjusted the carburetor for best operation using the Winfield instruction sheet. It was immediately obvious that the throttle arm on our carburetor was not suitable for street driving. The arm was so short that it was difficult to select any position other than idle or wide open.We found an arm in our used carburetor parts box that looked like it would work. It is about 1 3/4″ from center to center, the previous arm which we are now going to call a “full race” arm, was moved to the front of the carburetor for now. The longer “street arm” is now installed. We had to do some slight bending to our throttle rod and all was right with the world.
Driving impressions: The car is easier to drive because the Winfield carburetor has added several dimensions to its performance. First, the car is smoother at any and all speeds. It can idle slower, yet it has more torque at any speed. Shifting gears is more forgiving because you can do it either at faster speeds than before, or slower speeds. The engine doesn’t care. You have to kind of pay attention because the car does not labor as much at higher speeds, leading you to drive faster than you did before.
It kind of makes you wonder why no one makes reproductions of this carburetor. Another question; why were there not future Winfield carburetors made like this? There is no venturi, so the air is not cooled as in ordinary carburetors because the air does not change pressure as it moves through the carburetor. This causes the intake and carburetor to be much warmer than on other Model T’s equipped with typical carburetors. It does not seem to be a problem, just an observance. In any case we are pretty happy with this one.