A shiny new 1920 Model T Ford Center Door comes home for the first time.
The other day I went out to the garage with plans to go for a drive in one of the Model T’s. I was immediately confronted by a heavy gasoline smell. The first thought was to open the garage door to vent the vapors. Next I looked under the 1914 to see a drip pan under the car holding a considerable amount of fuel. Fortunately there was no fire! I had tried a newly rebuilt carburetor the day prior, and the fuel line evidently had cracked some time during or after my drive around the neighborhood testing the carburetor. The copper fuel line, of undetermined age, had failed as they always do. Time to make a new one from steel that won’t fail unexpectedly.
Ford built most Model T’s with a brass fuel line originally . While brass is still a good choice, steel is more readily available and even better for the job.
Copper is a relatively poor choice for fuel line. It is soft and bends easily, which also contributes to it’s weakness which is the tendency to work harden and crack in a relatively short period of time.
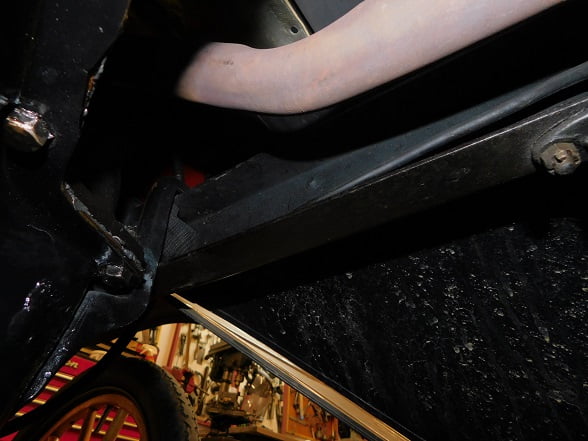
The copper line that we removed was routed over the exhaust about 12″ forward of the sediment bulb. It was wrapped with asbestos cloth at that point, probably to control vapor lock.
The existing copper line was routed over the exhaust pipe and through the frame rail, passing behind the engine mount wood block as Ford did originally. We intend to route the line forward without passing above the exhaust. Rather, we will stay towards the center of the car until the fuel line is clear of the exhaust and well below it.
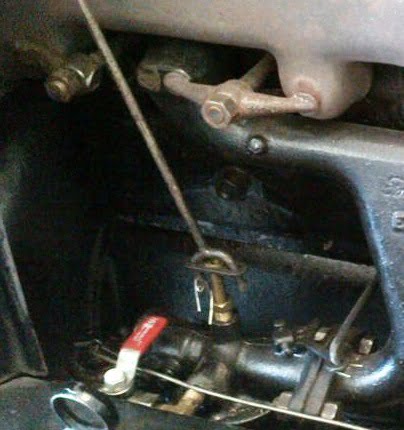
Another glimpse of the existing fuel line as it goes forward towards the engine mount where it passes below the outer corner of the wooden block.The fuel line comes into the rear of this shutoff valve. From there it comes out the front of the valve and a second short piece of copper line leads to the fuel inlet of this Kingston Model L carburetor.
Normally our car has a Holley NH carburetor fitted. We have been rebuilding all sorts of carburetors lately which requires testing the carburetor afterwards to make sure it functions properly. For that reason we have a second piece of fuel line forward of the shutoff valve in order to connect the fuel line to early style carburetors with low mounted fuel inlets.
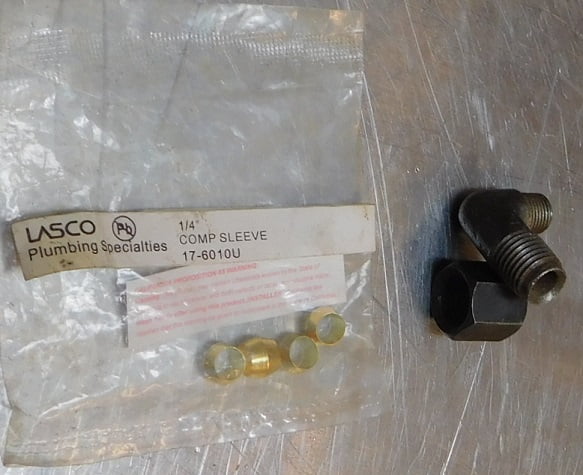
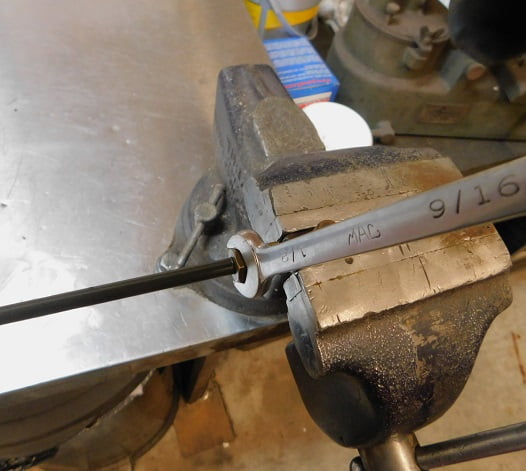
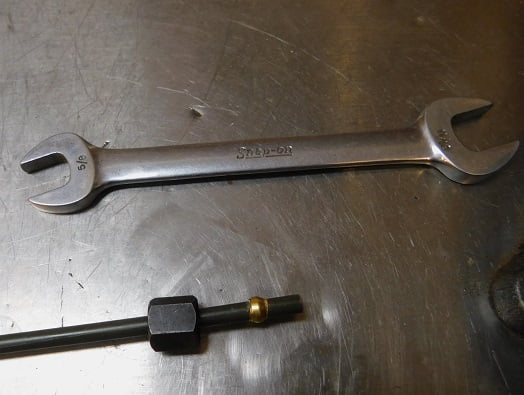
Normally the fuel shut off valve under the hood is connected directly to the NH carburetor by a 1/8″ NPT elbow as shown here.A final look at the copper fuel line just before we cut it in half to avoid having to take the engine mount block out.The old fuel line could have been used as a template if we were intending to route the new fuel line the same way. Black stuff on the line is grease and dirt from decades of use.We purchased a 60″ long, 1/4″ OD steel brake line from the local NAPA store. The vendor part number is PA-472. Napa uses P/N BK8131225.We re – used the steel nut at the sediment bulb end of our new fuel line. A steel elbow from the original carburetor inlet is used to fabricate the line, we did not install it on the car. Brass ferrules were used at each end of the new fuel line. Ford originally used felt as a compression sleeve, we like the brass ferrules better.At the forward end of our fuel line we used a 1/4″ compression nut along with the brass compression ferrule. A spare 1/4″ compression fitting was used to fit the ferrules on the work bench.An Imperial Eastman tube cutter is used to cut off the flared end of the steel brake line.The steel line is stuck in the fitting at the carburetor end so that we can mark the first bend. The yellow arrow shows a chalk mark where the first bend is placed. We bent our fuel line by hand, you could use a tube bender if you prefer.Using a tape measure we made the little sketch shown here to fabricate the fuel line.The end of the line that we cut off earlier was deburred using the tube cutter’s deburr tool. The steel carburetor elbow is clamped in the vise so we can pre – install the nuts and ferrules. You could do that operation on the car, but it is easier to do off the car.We tightened the nut finger tight with the line seated against the inside of the elbow and the brass ferrule under the nut. From this point the nut is tightened 1 additional turn which compresses the brass ferrule permanently. The line can be removed. The ferrule will keep the nut from falling off the line.The completed ferrule / nut installation.The small modern compression nut is installed on the other end of the fuel line in exactly the same way.The completed line assembly was installed. A little hand bending was required to get everything to align perfectly. If we were going to keep the Kingston Model L carburetor on the car permanently we would also replace the short forward piece of copper tube with steel for safety.
The last part of the operation is simply installing the fuel line, tightening the fittings, and checking for leaks. We did all that, and were able to go for a ride as we had planned to earlier in the day.