Replacing the Exhaust Manifold Glands and Exhaust Pipe on your Model T Ford
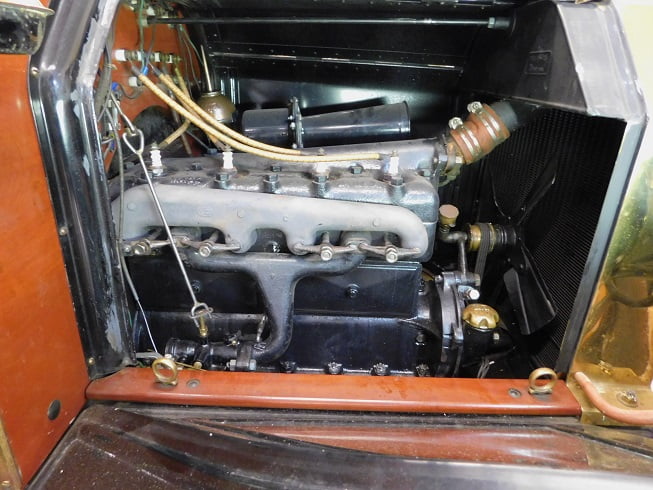
In our most recent tech article we rebuilt the muffler. After the new muffler was in place we were able to enjoy a much quieter T driving experience. But now we could hear exhaust leaks under the hood. Clearly a more exhaustive examination was in order. In this issue we will show how to make this common job easier and how to get great results every time.
A 3Z624 Ford Exhaust Nut wrench was used to remove the exhaust pipe from the manifold. If you own a Model T you need one of these. Reproductions are sold by all the Model T part vendors. There is no way to properly tighten a T exhaust nut without one.
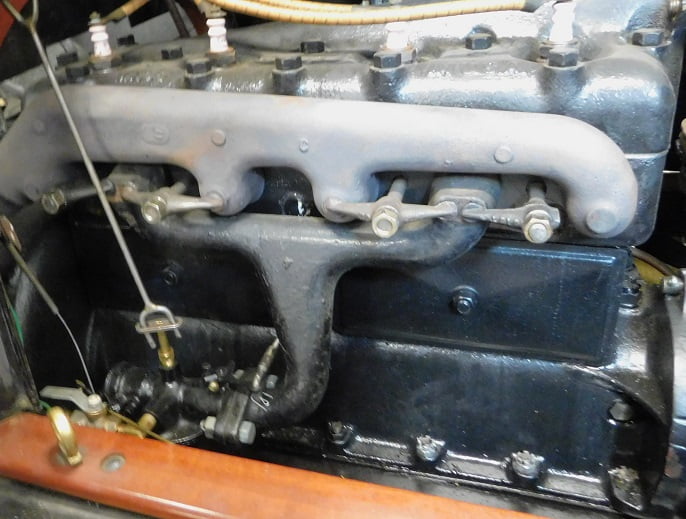
We could tell by listening to the engine with the hood open that there were exhaust leaks at the engine / manifold juncture. It was time to take things apart and fix what is one of the most common issues to find on any Model T Ford.
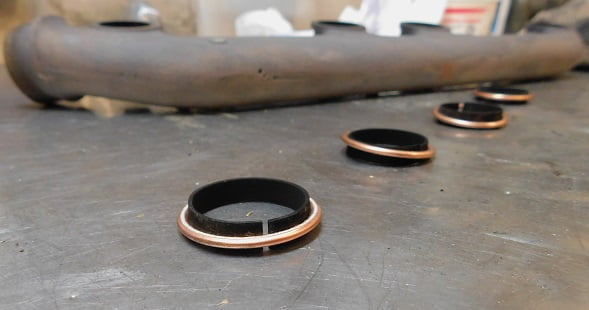
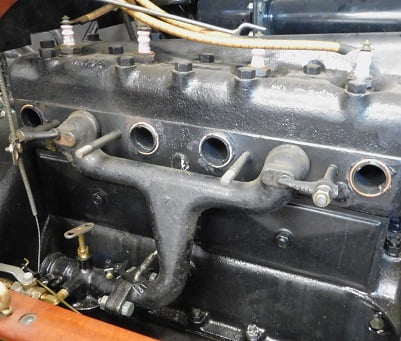
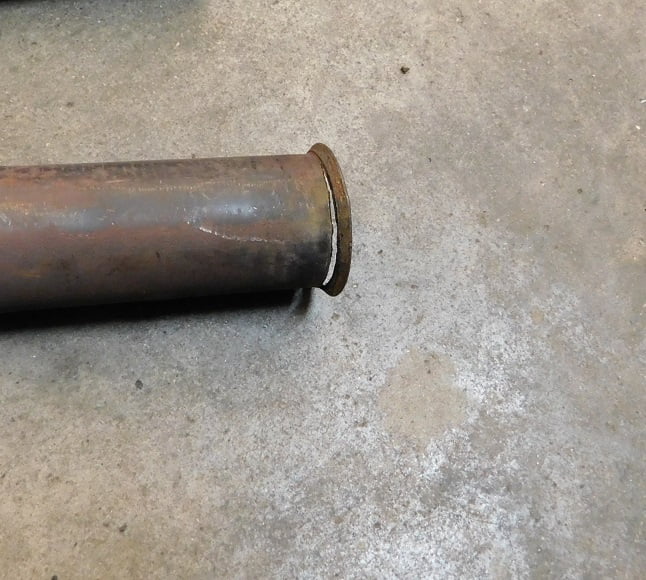
We use a 9/16″ wrench to remove the nuts securing the end clamps that hold the intake and exhaust manifolds to the engine. Then we remove the clamps. The inner two clamps are left in place for now.We made a tool from an extra pair of exhaust / intake clamps by cutting off one leg from each clamp. These “half clamps” will be used to hold the intake in place while we swap out the leaking exhaust rings.We install the half clamps so that they are securing the intake manifold only. This way we can avoid dealing with the intake while it is working fine. It saves us two copper gland rings and a lot of time.We remove the other two full clamps and lift the exhaust manifold off. The half clamps keep the intake right where it was.Just a few graphics to show the evidence of leaks from cylinders #2 and #3. We wiped the ports down with some isopropyl alcohol and a rag.We removed the copper gland seals from the inner steel rings. The steel rings can be re – used. The flat copper rings are used once, then replaced every tme a manifold is removed for any reason.New copper gland seals were purchased from Lang’s.We test fit the glands on the steel inner rings. We had to hand bend the inner steel rings until they fit closely inside the copper glands. We also made sure they would fit into both the engine block and the exhaust manifold.Each of the steel rings has a small gap (arrow). We apply a bit of RTV gasket maker to each of these gaps. Then we apply sealant around one side of the ring / gland and stick it in the engine port.The manifold was wiped down with alcohol around each port. Then we slimed it with sealant around each port.This is how it looked right before the manifold was installed. With gasket maker on each of the sealing surfaces we hope for no leaks this time. We set the manifold in place carefully to make sure all the ports were aligned, then installed the two end clamps and tightened them using a 9/16″ wrench. Do not overtorque these nuts. Use a regular sized wrench, not a 1/2″ drive socket with breaker bar. Too tight = broken parts.With the inner clamps installed, the half clamps can be removed and replaced with the whole ones. Again, just tighten them using a 9/16″ wrench and normal hand strength.With the front and rear clamps in place, re – check tightness on the inner two clamps. You will find that you can now get another 1/2 turn on each. With this done we can install the exhaust pipe.We looked the exhaust pipe over just prior to installation. Here’s what we found – a flare that was almost cracked completely off!We got a new pipe from Lang’s. With the new pipe laying on top of the old pipe clearly the new one is too long. The old one fit perfectly. The muffler won’t accept a pipe that is overly long.We marked where the pipe needed to be cut. A tube cutter is used to remove the excess.
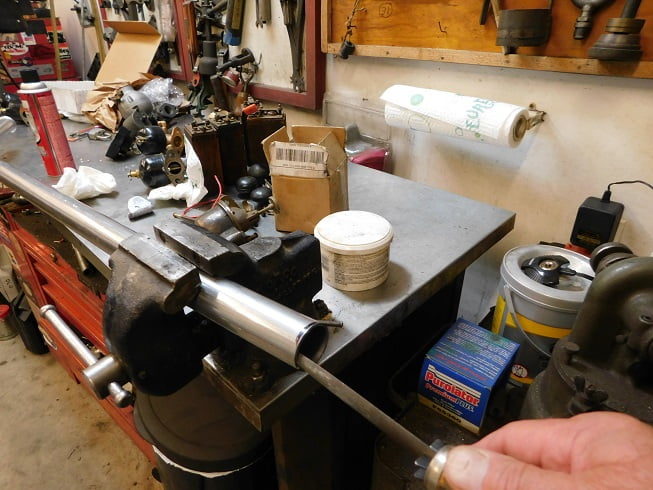
A half round file is used to remove sharp edges. This sounds unnecessary, but it will prevent the pipe from cracking in the future.
The exhaust nut would not come off the old pipe because it could not clear the bend, where the pipe was flattened out by some long ago muffler shop guy. We used a pair of pliers to fold the cracked lip of the flare and then pulled the nut off the other way.The nut slips on the pipe from the rear. It’s ready to install now.With the pipe in place we carefully start the nut on the manifold, then turn it by hand until it is snug. The Ford exhaust nut wrench is used to tighten the nut.You will find that the wrench can be installed on the nut in several different ways, each of which will allow a bit more rotation of the nut.Using the wrench in every possible way the nut is tightened until it won’t move any further.In review, we have now replaced the muffler shells, the exhaust pipe, and the manifold gland seals. The car now sounds like it should – no leaks! After getting the engine warm we were able to tighten the nut another 1/2 turn.This photo was posted on our Facebook page. It shows a custom bodied Model T in the port of Honfleur, Normandie, FR.