Rebuilding the Zenith 04 Carburetor for your Model T Ford
The great thing about having a speedster; you pick the parts that you want on it. An aftermarket carburetor and intake are just the ticket – even the dog approves.
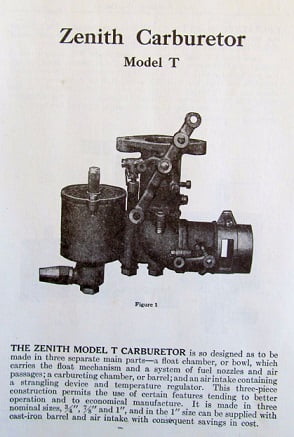
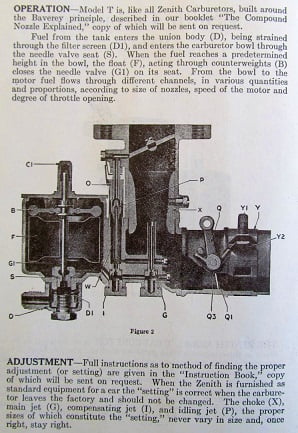
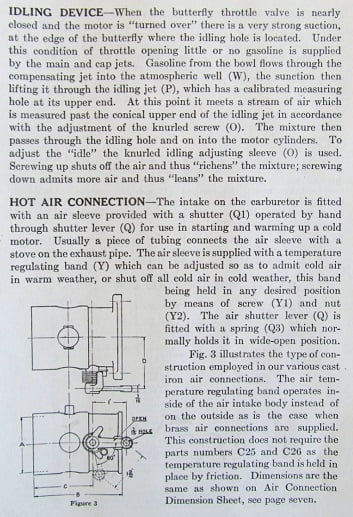
The Zenith carburetor company was large even in the earliest days. It was a very popular carburetor in both France and England for aircraft use in the earliest years. French inventor and tinkerer Francois Bavery “perfected” the Zenith design from his experiments in 1906 – 1908. His contribution was a dual jet design, with one main jet supplying the primary mixture to the throttle bore, and the other “compensator” jet being open to the atmosphere as a “compensator”, thereby offsetting the mixture as throttle position and engine speed changes. The theory is quite novel. A “cap jet” surrounds the throttle main jet, modifying both the vacuum signal and the fuel flow at various engine demands.
Francis (or Francois) Bavery’s design became the standard for many years at Zenith.
Zenith was never an OEM carburetor supplier for the Model T Ford. However Zenith made several accessory carburetors and carburetor / intake manifold combinations for the Model T Ford. We had a chance to rebuild one. Follow along and see how it went.
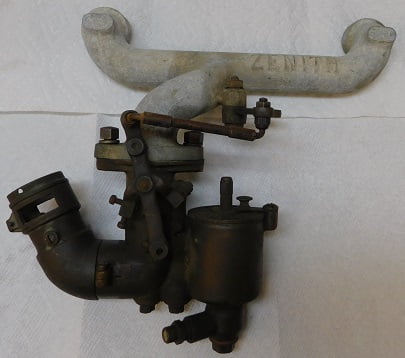
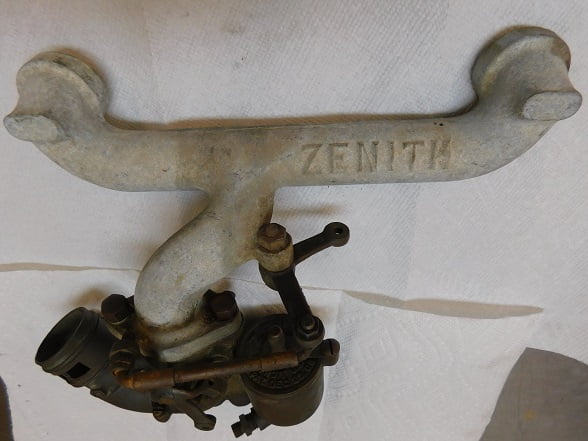
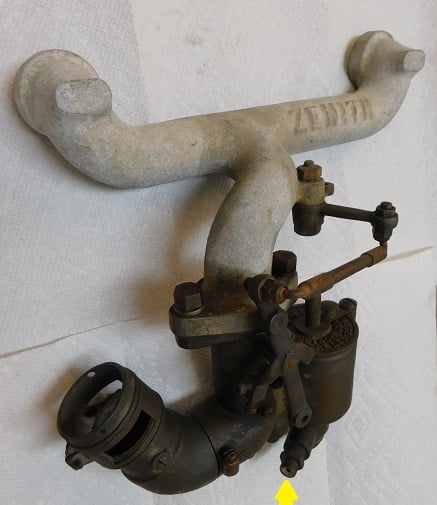
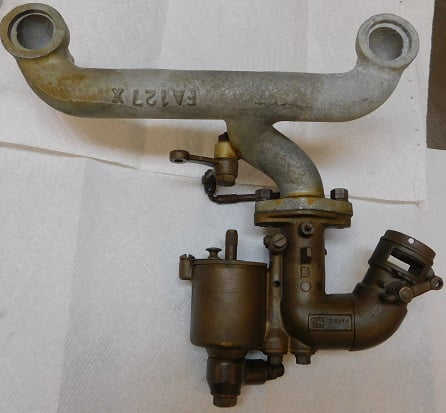
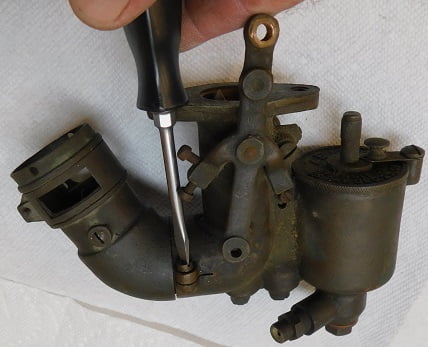
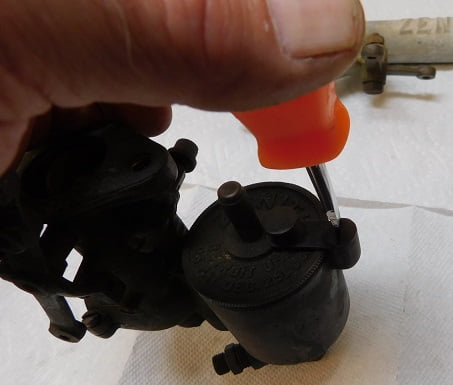
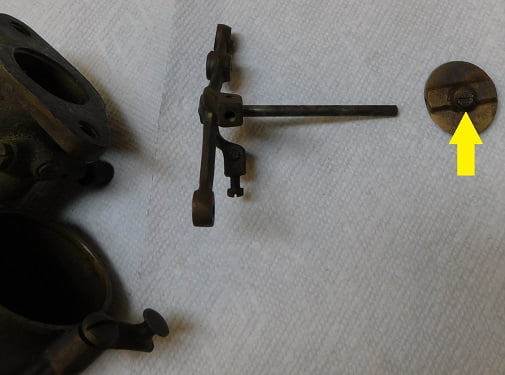
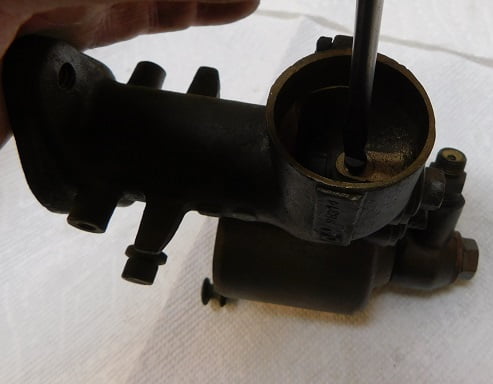
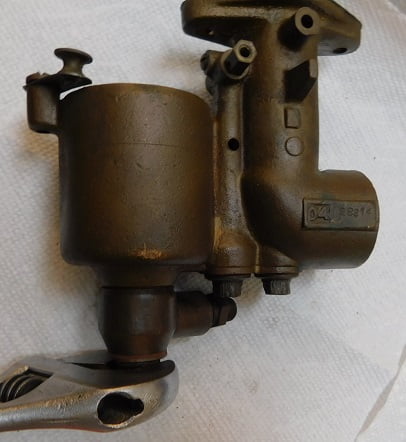
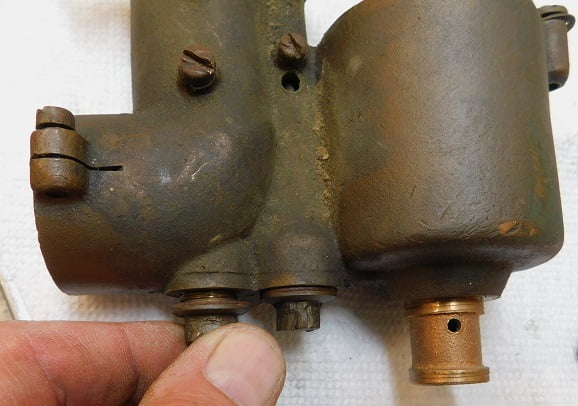
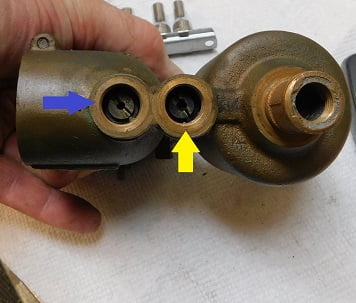
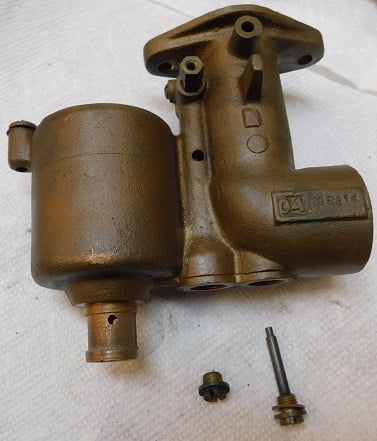
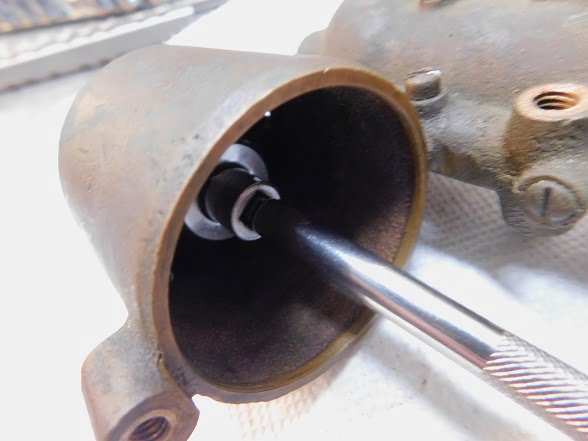
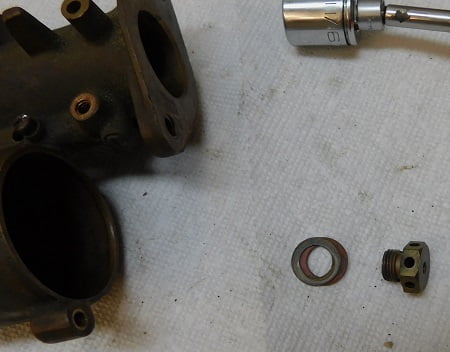
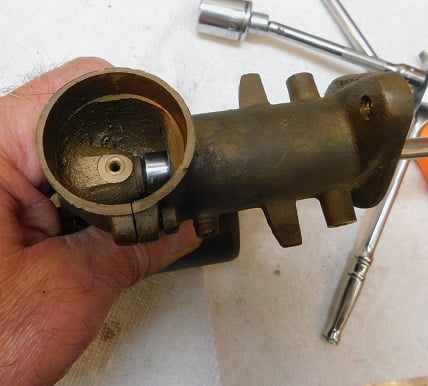
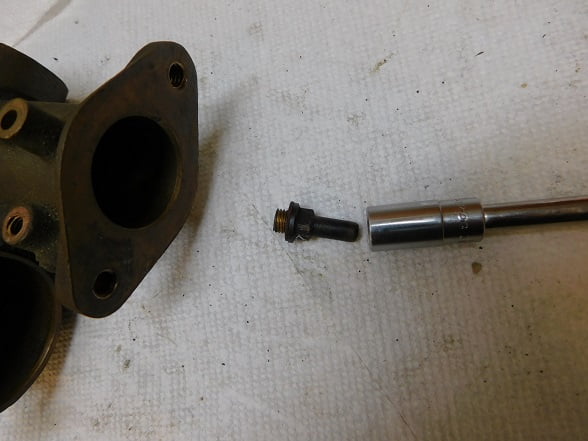
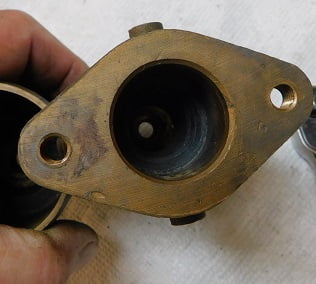
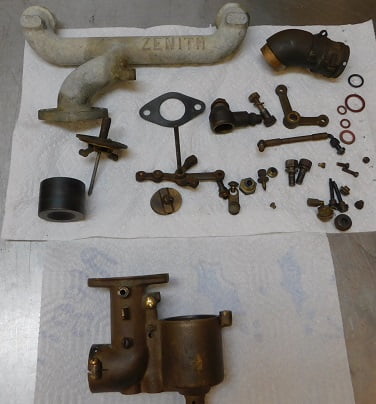
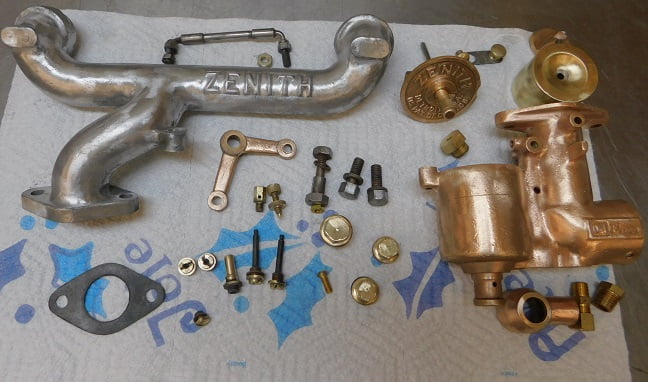
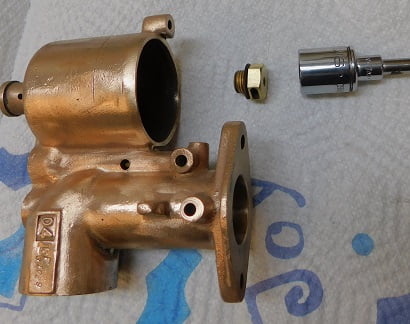
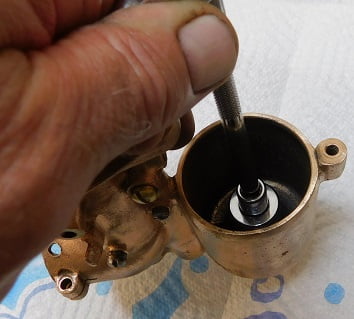
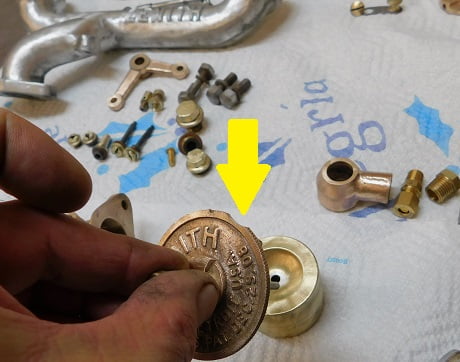
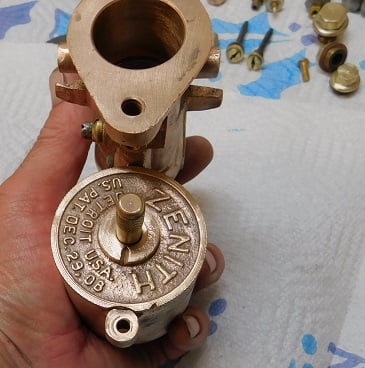
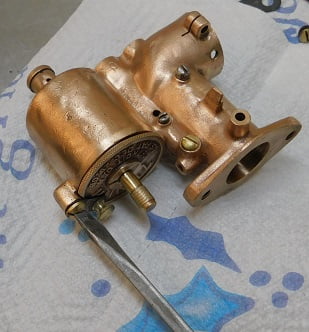
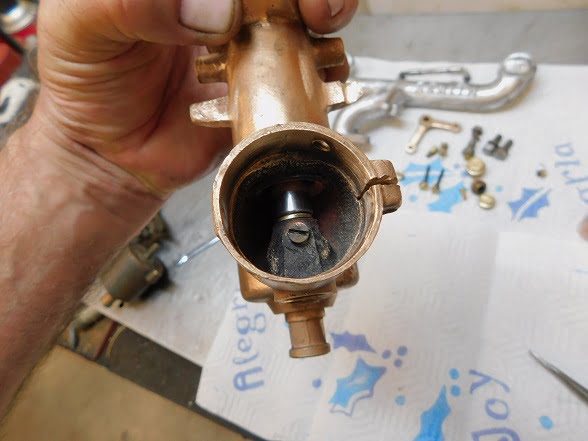
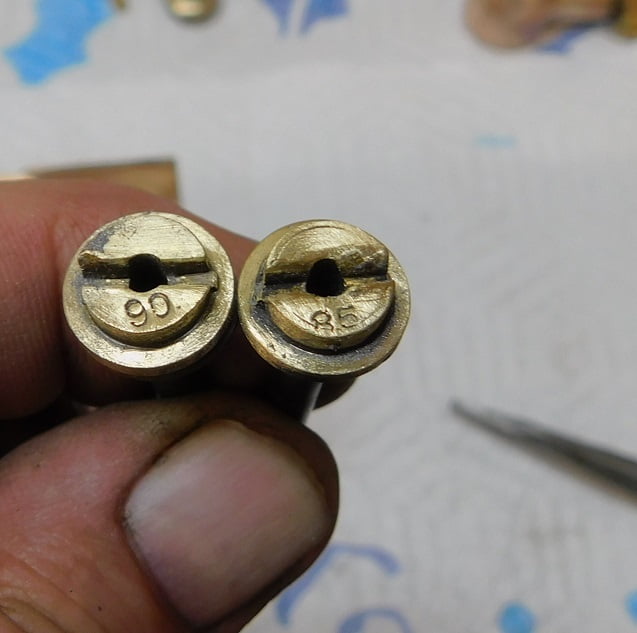
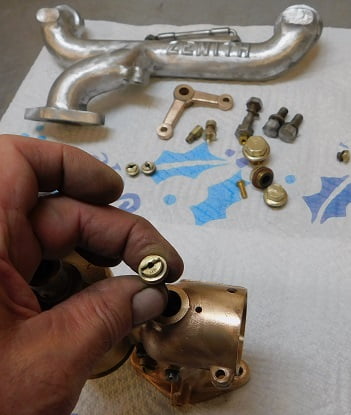
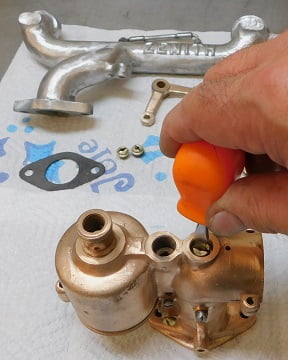
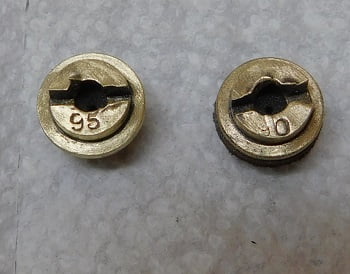
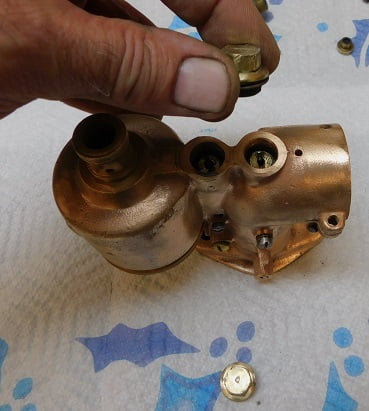
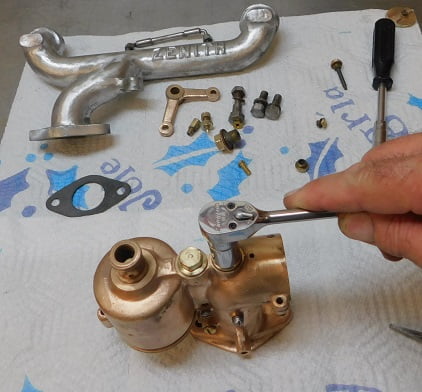
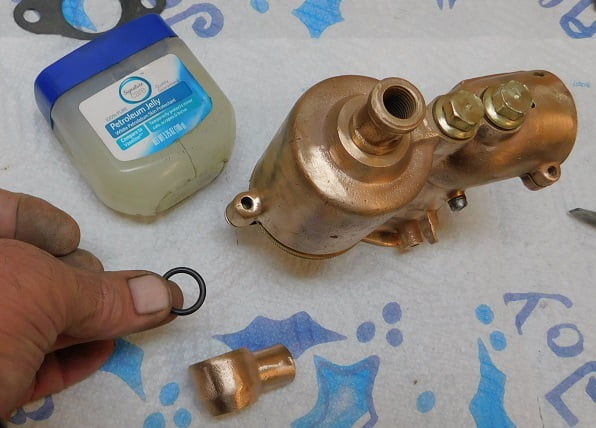
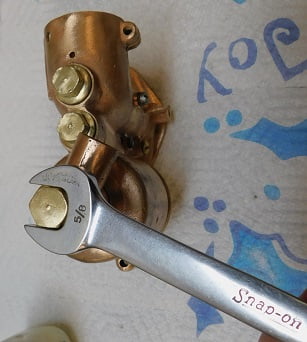
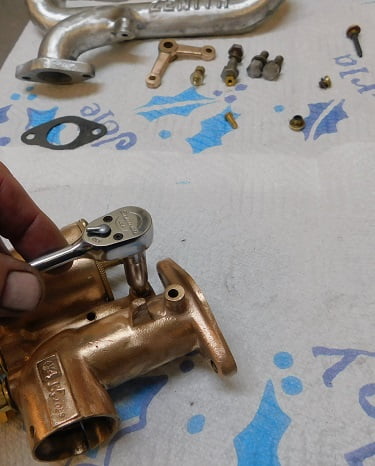
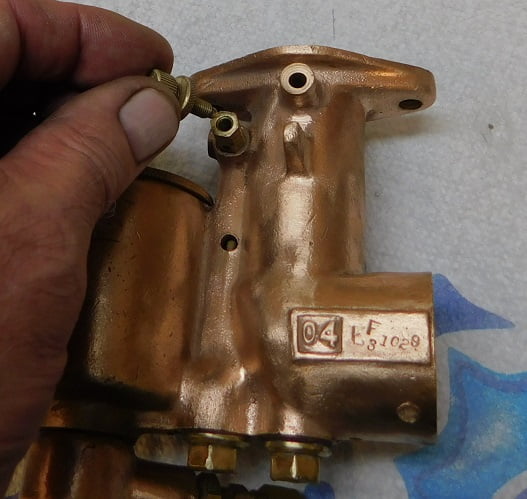
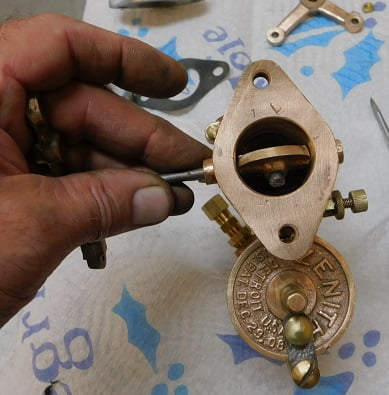
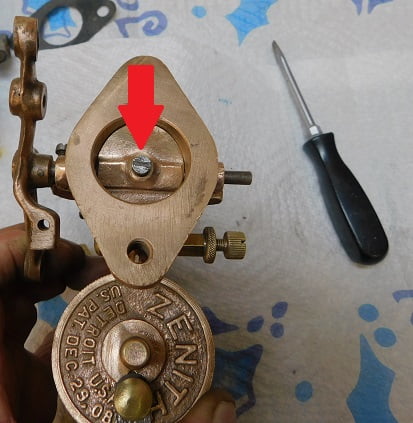
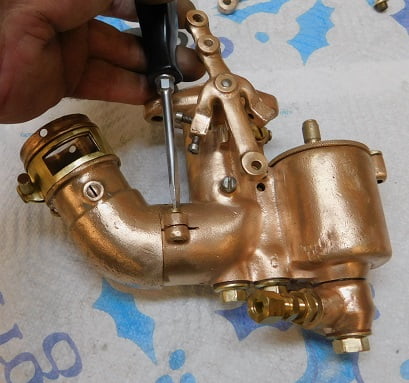
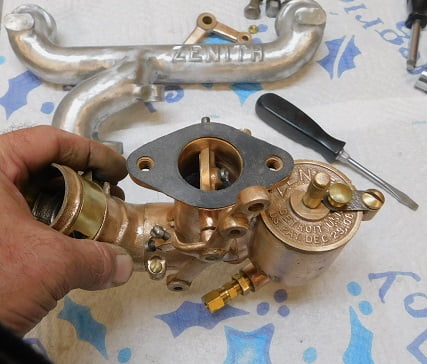
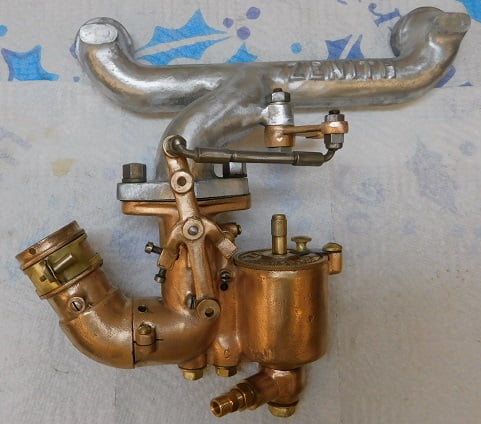
Zenith sold many of the 04 carburetors as original equipment for brands such as the Chevrolet 490 and early Essex 4 cylinder cars. Ours has a special intake manifold that incorporates linkage for the Model T. It is extremely corroded, grimy and dirty, suggesting it was used on a car for many years, and then sat for many years after that.The aluminum intake positions the carburetor far to the rear, indicating that the design was made to clear generator equipped Model T’s.Note the fuel inlet – it is blocked by a mud dawber deposit.The casting number can be seen on the rear of the intake manifold, FA127X.We start disassembly by removing the carburetor from the intake. A single screw clamps the choke assembly to the carburetor.The cover for the float bowl is made to be a simple lift and turn operation, but we remove the screw so that the part can be cleaned.The float and its needle / fuel shut off mechanism is typical of many early carburetor brands including Master, Stromberg, Winfield and others. Very reliable and trouble free, yet complex and expensive to manufacture.A single screw (arrow) retains the throttle blade to the shaft. Loosening it allows both parts to be removed.This screw can be removed in order to clean the fuel passage leading from the compensator (see the diagram on the title page) to the cap jet.The fuel inlet is removed so we can clean out the mud dawber nest. The inlet has gaskets above and below. We try and save all gaskets because otherwise we have to manufacture replacements.Two hex nut plugs are removed to expose the calibrating jets. Each plug has a gasket.Left, the blue arrow points to the main jet. The yellow arrow points to the compensating jet.The two jets are removed. Each has a gasket.An 11/16″ socket is needed to remove the fuel inlet seat from the bottom of the float chamber.The fuel inlet seat has two gaskets, one is plastic to prevent tearing the paper one while tightening. The cap jet must be loosened with a small wrench, then it can be spun out with a nut driver. It has a gasket that needs to be saved. The filthy little cap jet with its gasket.Zenith 04 carburetors have a pot metal venturi inside the brass carburetor body. We actually disassembled two carburetors for this article, and used parts of both to make one from all the best parts. The venturi was cracked on one of the carburetors, so we used the other one.All the parts are laid out in preparation for cleaning. The brass parts go into the carburetor cleaning solution. All the steel hardware is placed in Evaporust. We use mechanical means to clean the corrosion from the aluminum intake manifold.After a few days of soaking, polishing, and scrubbing the carburetor is ready for assembly. Note – some parts are still in the cleaning solution including the throttle and choke assemblies.We put petroleum jelly on each gasket so that it would not tear during installation. This is the fuel inlet seat.Note the cut out in the float bowl cover; it fits around the screw lug that retains the cover hold down device.There is not a gasket between the float bowl cover and the main body of the carburetor.The cap jet is spun into place, along with its gasket. Then we tightened it with a small wrench.Since we disassembled two carburetors from two different applications we have two main jets to choose from. We are going to start with the smaller of the two, #85.The main jet and its gasket are installed.gain we have two compensator jets to choose from. We use the smaller #90 to try first, along with its gasket.The lower plugs are installed with their gaskets.The fuel inlet assembly (“banjo fitting”) had a gasket that tore on disassembly. We found an O-ring that was the same size in a leftover collection of stuff. Sometimes it pays to be a pack rat. Other times, not so much.With the fuel inlet positioned to point towards the frame rail and to the rear of the car, we tighten the fitting.The mixture regulating screw adjuster base is tightened to the carburetor body. There is no gasket.We turn the regulating screw all the way in, then back it out 1 1/2 turns, and secure it with the thumb nut. This mixture adjustment affects idle quality and will be set later with the engine running.We install the throttle blade and shaft / lever assembly.We hold the throttle against its idle stop with the adjustment screw completely backed off.Then, with the throttle blade shut completely we tighten the screw.The choke assembly is coated with a light smear of silicone RTV, and assembled. Then the tension screw is tightened.The inlet gasket is positioned, and the carburetor can be mounted to the intake manifold.As part of any carburetor rebuild typically we chase all the threads with an appropriately sized tap or die. The throttle linkage was an unusual #14 – 32 size that is not found in use many places.Apparently this carburetor was supplied with a straight choke hosing at one time, at least that is what the Zenith manual depicts. Notice the text says that cast iron barrel and air intake (manifold) can be supplied at a cheaper cost. Our example is 1″ size, but the manifold is aluminum and the carburetor barrel is of course brass..Our Zenith is now ready for testing and tuning. We will report how all that went in the next edition of Model T Ford Fix.