
The Ruckstell rear axle has long been the favorite accessory of every Model T Ford owner going back to when the axle was first introduced by Hall Scott corporation in the late 19-teens era. The Ruckstell is a two speed rear axle that can be shifted while the car is moving. This allows higher final drive gearing for lower engine speed at cruise, yet when in low range it gives superior hill climbing ability given the 20 horsepower that is available. As great as the Ruckstell axle is, it creates a problem after solving the issue of being able to negotiate steep hills. A Model T Ford uses a brake inside the transmission to stop the car. If there is any failure of the Ruckstell to shift, it can become disengaged, i.e. “free wheeling” and thus the car will not have any effective brakes!
The hand parking brake notwithstanding, it is a scary and very bad thing to lose the connection between the brakes and the rear axle on a steep hill in a Model T. This can and has occurred to Model T enthusiasts with dire results including death and serious injury to occupants of the car. It is not just possible with the Ruckstell rear axle, it can happen with the stock Model T axle if the driveshaft or pinion gear breaks, again something that has and will happen to some Model T’s. The same can be said of Model T’s equipped with any sort of auxiliary transmission, if they slip into “neutral” unexpectedly it can be a very scary ride indeed.
The answer to having a degree of safety and redundancy in the Model T brake system is to install some sort of accessory braking system. One that has been around for quite some time and is known to work well is the excellent Rocky Mountain Brake system. This equipment is advertised in all the major Model T publications and is sold through all the usual reproduction part sellers. We will show the effort and typical problems encountered to aid the average guy when he installs this setup.

Above, many Model T Fords have a Ruckstell Axle. It was and is perhaps the most popular Model T accessory of all time.

First let us state that the images and descriptions shown here do not preclude reading and understanding all the directions that come with the Rocky Mountain Brake kit. You, and you alone are responsible for the installation of anything on your 90+ year old car. Please read the instructions that come with the kit. We share this information to aid in your understanding. By no means is this information intended to solely instruct the car owner or mechanic to install this system.
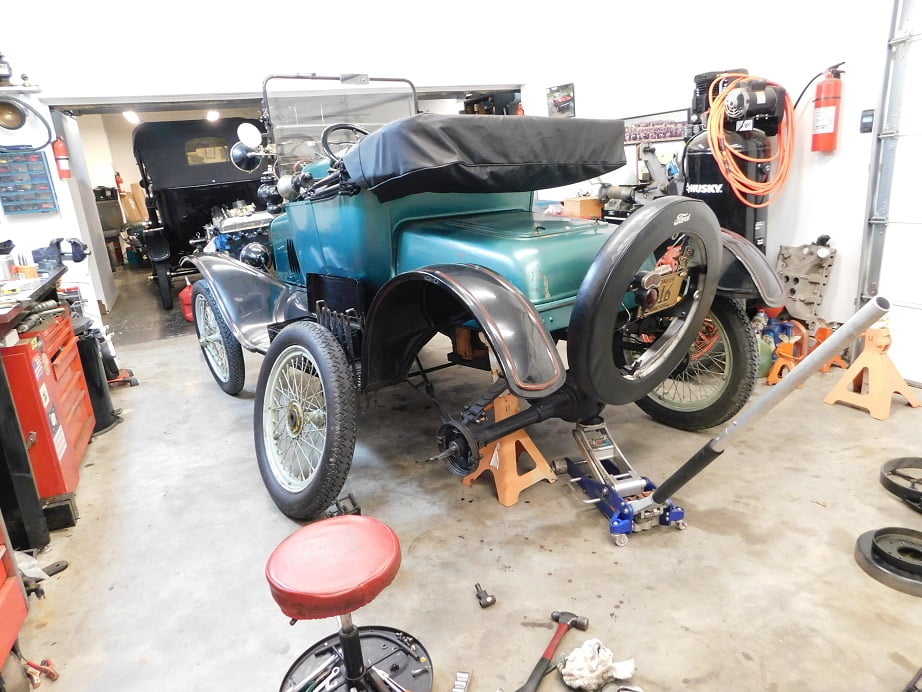
Our car is a 1917 torpedo runabout, a car that has been in the family since it was purchased from the original owner in 1951. The car gained a set of Hayes wire wheels in the 1950’s, and the Ruckstell axle was installed in the 1970’s. The car has now been in the family for 66 years, and we want it to be safe for future generations.
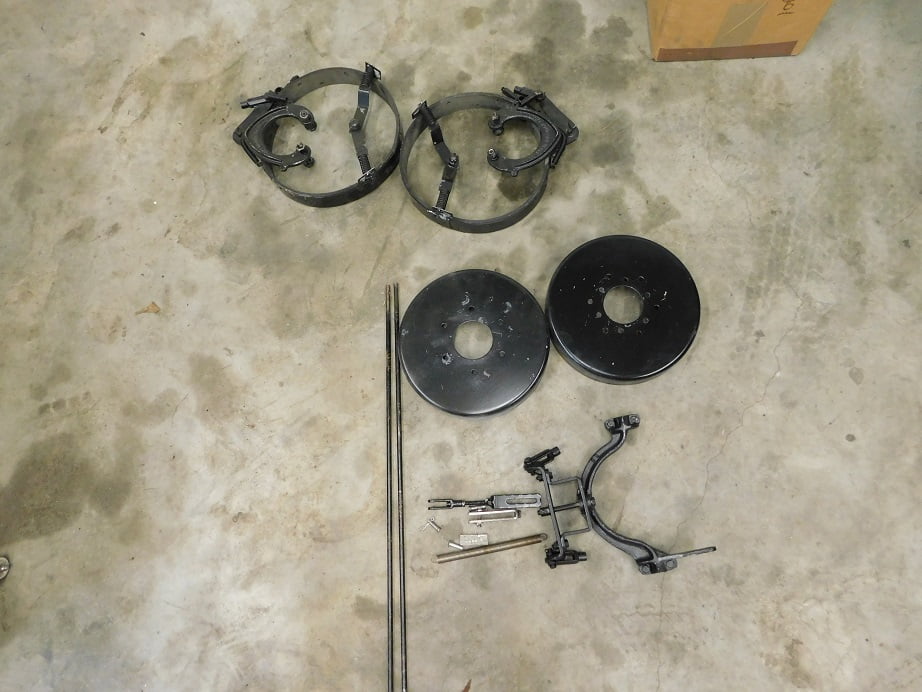
Before starting the installation we painted all the parts black and read the installation instructions carefully.
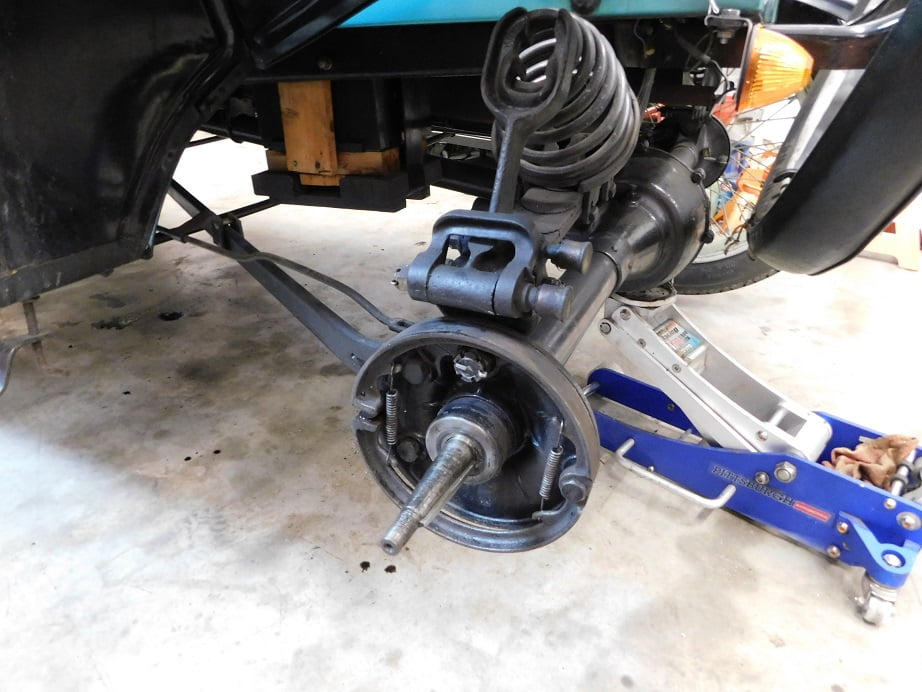
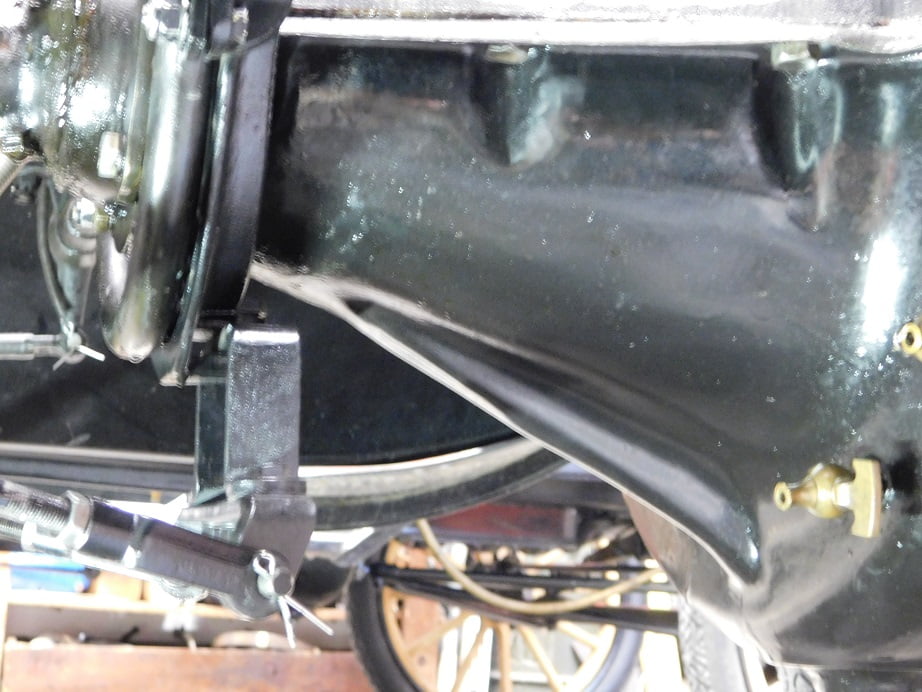
The first step is to remove a rear wheel so that the brakes can be added. We jacked the car up, installed a jack stand, and pulled the left rear wheel. The Hassler shocks on the rear axle will not work with the Rocky Mountain brakes so they will have to be removed.
The Hassler parts removed, we can continue with installation.

Our car has Hayes wire wheels, a popular and attractive period accessory. The Hayes rear hubs have a special, smaller diameter bolt pattern holding the parking brake drum to the wheel. We will have to drill the Rocky Mountain brake drums to match.

The Hayes brake drum has both Ford and Hayes bolt patterns. This allows us to bolt the Hayes drum to the Rocky Mountain brake drum to properly align the two. We drill the six 3/8″ diameter holes on a drill press using cutting oil and low speed. The Ford brake drum is placed inside the Rocky Mountain brake drum. The bolts are cleaned in MEK, dried, and then green semi permanent thread locking Permatex compound is applied to the bolts before the drums are secured to the wheel.

In the photo above a yellow arrow points at an axle shim that is needed to compensate for the additional thickness of the added Rocky Mountain brake drum. The shim is .020″ thick, it moves the axle .090″ out from center. The shims are not included in the RM Brake kit, you must purchase them separately or fabricate them yourself. The Rocky Mountain brake parts are assembled per the instructions using the new hardware supplied in the kit. The rear wheels are installed and the axle nuts tightened and new cotter pins installed.
Next we removed the floor boards and the transmission door so that the brake pedal could be removed. Our 1917 had a starter added, so the bendix cover had to be removed in order that the brake pedal could be removed and replaced. 
There is a piece of steel plate included in the kit. You must drill a 5/16″ hole in the plate to accept the brake clevis. The plate must be beveled on the end to be welded in order to allow a larger surface area for the weld, making it stronger.. A flat spot is ground on the bottom of the pedal so the plate will have full contact in the area to be welded. I took my pedal over to my friend Nolan’s house. Nolan skillfully used his DC Arc welder to put a nice fat bead on both sides of the plate.

Another view of the plate installed on the bottom of the pedal. The pedal assembly can be painted if you wish, but given the environment it lives in there is little reason to believe it would ever get rusty.
The brake rods and clevis assemblies from the Rocky Mountain kit were assembled. The equalizing assembly is installed on the forward side of the Model T parking brake shaft. All the clevises are hooked up with no cotter pins for now.

Above, an overview of the installed brake pedal and equalizer with the brake lever as far forward as it can go. It is important to properly adjust the Ford parking brake before connecting the Rocky Mountain Rods. The Ford parking brake lever when fully forward should leave the brake cross shaft clutch arm just barely clear of the clutch adjustment bolt. When the parking brake is applied with the Rocky Mountain brakes disconnected the Ford brake lever should be vertical, not all the way back against the seat.

In the above photo we see just a little clearance at the sliding clevis pin (yellow arrow). The Ford brake pedal is adjusted so that when applied the brake pedal is fully engaged and will stop the car with the pedal about 1″ above the floor board. Test drive the car with the Rocky Mountain brakes completely disconnected, make sure that the Ford brake functions properly when going forward and reverse. In this photo the parking brake lever is all the way forward, note the (red arrow) clutch adjustment bolt just clearing the brake cam.

Above, another view showing the controls in the driving position with brakes released.
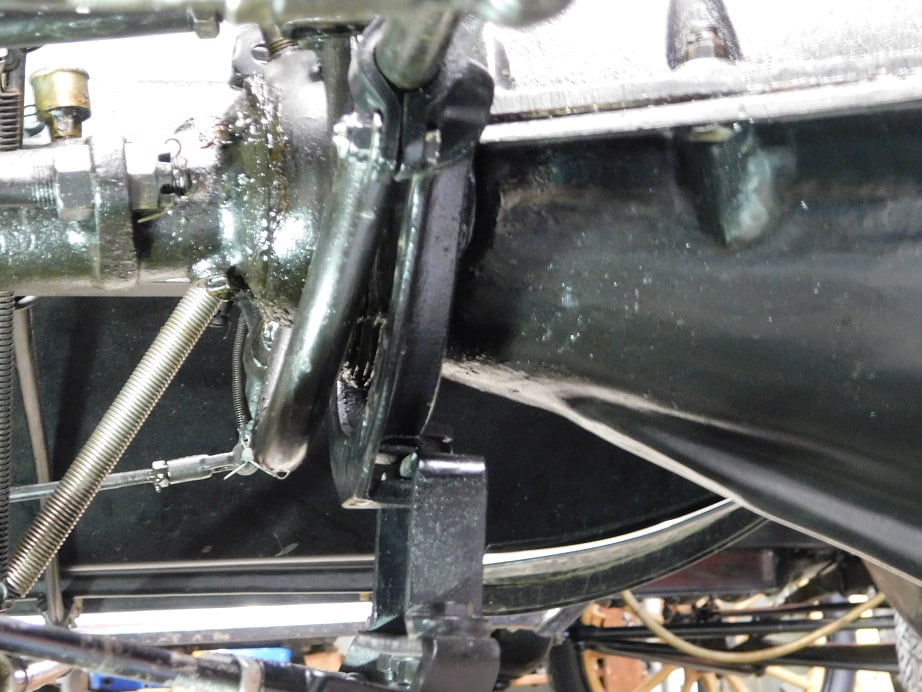
Above, the view of the equalizer under the car with the brakes released and properly adjusted.
Above, with the brake lever applied the equalizer assembly is pushed forward by the Ford brake lever shaft. It moves the brake rods approximately 1/2″ with everything adjusted properly.
Once you are happy with all of the brake adjustments double check all of your work. Make sure all the bolts and nuts on the brakes at the rear wheels are tight and install all the cotter pins, but don’t bend them fully quite yet. Take the car on a test drive for a few minutes. Make sure the car will stop while backing up. Make sure the brakes hold well on a hill, going backwards and forwards. Some additional fiddling and adjusting will e necessary, I played with adjustments for nearly half a day before becoming satisfied. When you feel that all is right then get the car up to cruising speed, with no traffic around and dry streets. Perform a few panic stops to see how it feels. The car should stop without pulling to one side or the other.
One thing that I found after the first test drive was a horrendous oil leak. When I removed the brake pedal I had removed the starter bendix cover to get clearance. It was removed again to try and figure out why we had such a big leak. With it all apart again we were surprised to find the gasket appeared to be perfect and no apparent problems. Everything was cleaned with lacquer thinner and gasket sealant was used on the next attempt. There were no leaks from the bendix cover after that.

With the new Rocky Mountain brake system the car stops in much less distance than before. Steep hills are no longer as frightening on the way down. An extended drive revealed no other issues.