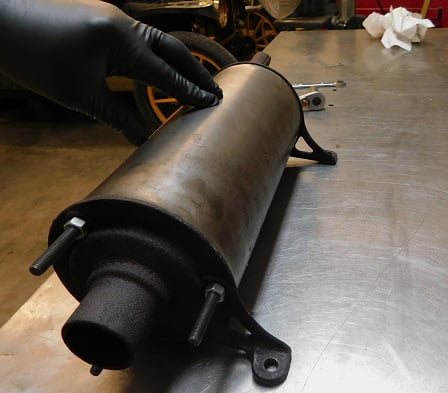
The typical Model T Muffler used from 1914 – 1917 has cast iron ends, rolled steel shells, and three bolts securing the parts to one another. Earlier mufflers are similar except that the mounting brackets are separate pieces of stamped steel. Later Model T mufflers have no tail pipe and use only a single bolt through the middle to secure all the parts together.
Our 1914 Model T has gotten louder over the years. So loud that it sounded as if there was no muffler. A quick glance under the car confirmed that there was indeed a muffler. We decided it was time to take it apart and see why it was not doing its job any more. While this is a 1914 muffler, the process of overhauling a muffler is essentially the same for all years.
The Model T Ford muffler is a simple design that serves to cool the exhaust gases and reflect the noise back and forth twice before it is released out the tail pipe. A period shop manual describes the operation of the exhaust system, including the muffler.
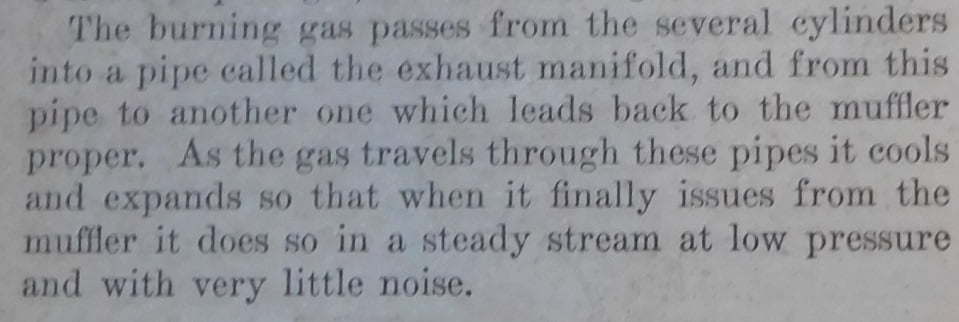
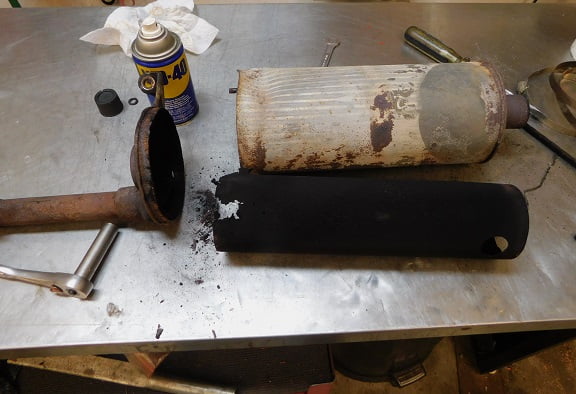
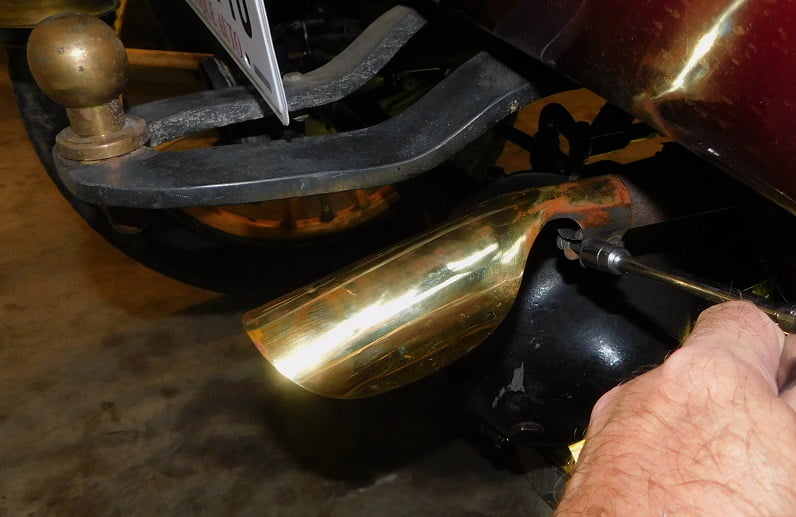
Removing two cotter pins and two nuts allowed the muffler to be on the work bench for inspection. Ours is wrapped with asbestos cloth as it was originally, though the clamps are modern ones. It has an accessory brass deflector on the tail pipe that could use polishing.
We soaked all the nuts with WD-40 as they looked to have never been removed since new. Removing the nuts is the only step needed to take it apart. We also are removing the asbestos wrap. We took it outside in the driveway, wore a particle mask, and removed the clamps so that the asbestos could be disposed of safely. We won’t be re – installing any asbestos.
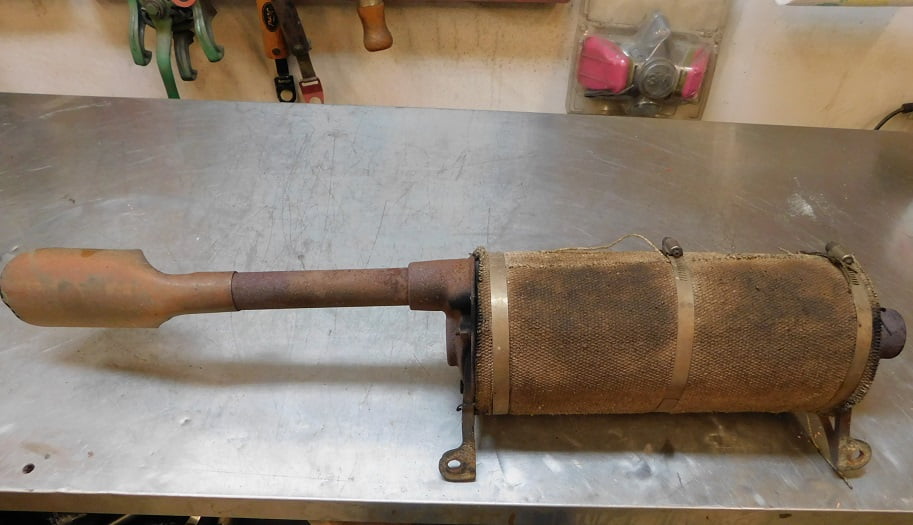
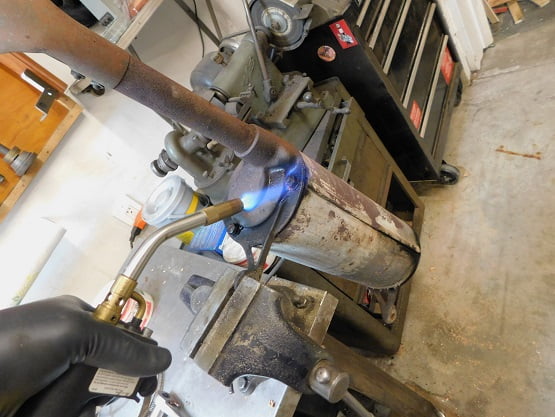
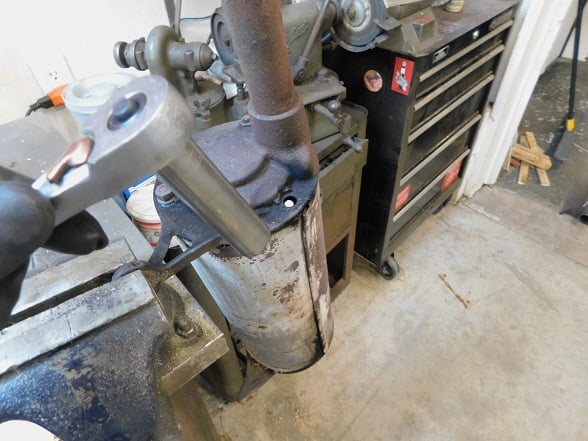
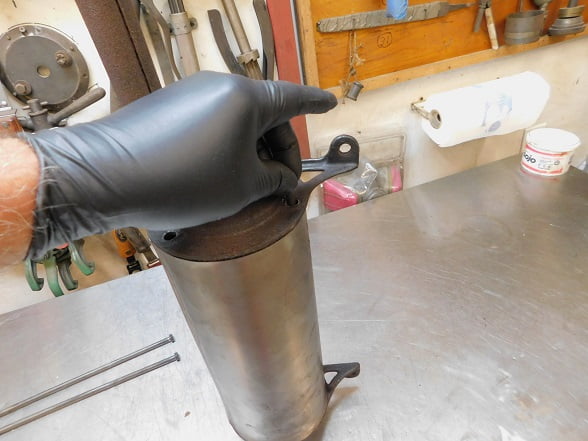
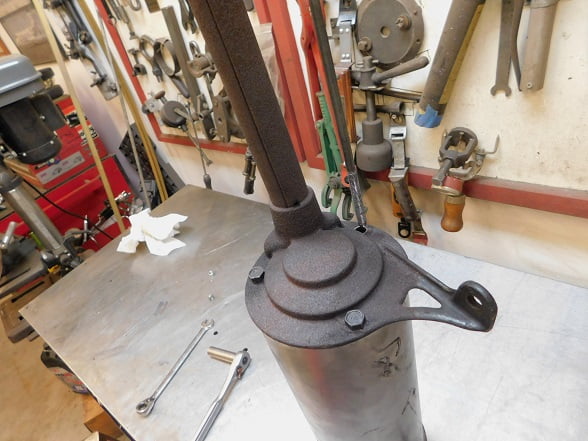
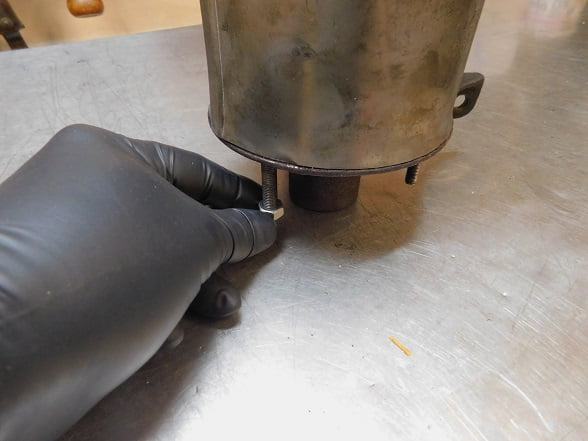
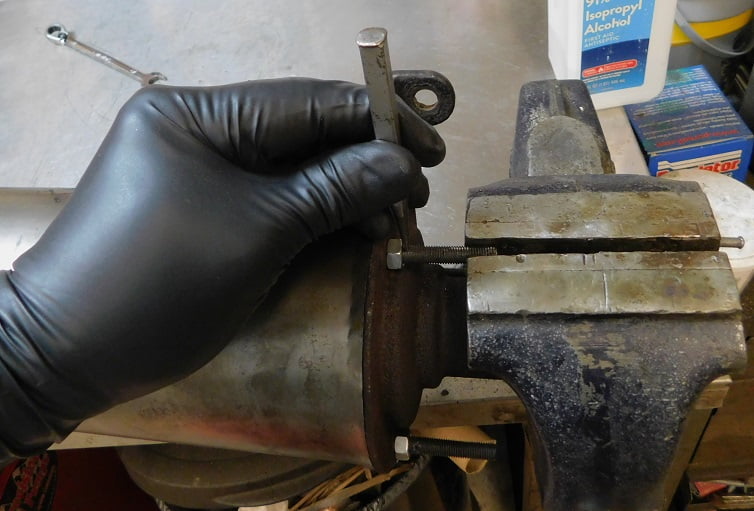
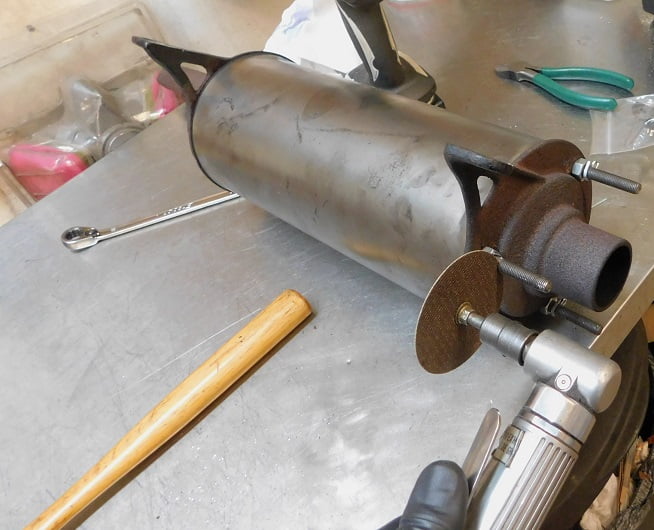
The penetrating oil worked on two of the nuts. The last one was quite stubborn. We decided to apply heat, then let it cool.Our next attempt to loosen the nut resulted in the bolt breaking off. Fair enough – it’s apart now.With the bolts out we were able to open the muffler to view the grim inner components. The innermost shell was completely missing, apparently someone left it out intentionally. The second shell was almost rusted away, it was paper thin and missing most of the rear portion. The outer shell was nearly rusted through and buckled where one of the clamps had been. The bolts were corroded to a smaller diameter, and of course one was already snapped off. We ordered three new bolts and a shell kit from Chaffin’s.We had to do a little hand bending of the outermost muffler shell so that it fit around the cast ends, you can see the flared out portion if you look carefully at the ends. This was accomplished using a pair of pliers. The inner shells or baffles are installed with the holes oriented as shown here. It’s really easy to do if the muffler is set on end as shown.Gravity is our helper when assembling the muffler. We re-used the tailpipe, it looks solid enough to last a few more decades.The tailpipe end is placed on top. If all is centered properly it will sit in place as shown. We orient the mounting arms roughly inline with each other.Installing the bolts is super easy if you carefully hold each of them using just one finger and thumb. Gravity guides the bolt through the lower hole. This is much more difficult if the muffler is on its side. It’s getting quieter already!With the three bolts hanging in their holes we install the nuts finger tight With the nuts just finger tight we roll the muffler on its side until both mounting arms are touching the bench. If one arm is touching and not the other, you can adjust them so that both are in contact as shown. Be sure to do this or you will have to loosen the nuts later to align the arms with the frame of the car.You cannot tighten the nuts very tight or you will damage the shells. In the past we have had these bolts fall out while on tour. This is inconvenient since the bolts are not easy to find locally, and shipping costs far more than another bolt. We drilled a 3/32″ hole in each bolt and installed a cotter pin to prevent any of that.The vendors sell the bolts in one length which is long enough for the later T mufflers. Those later mufflers use only a single bolt. We cut off the excess from each bolt just past the cotter pin hole.You can put a smear of RTV in the muffler inlet if you want to prevent any leakage. Ford never used anything to seal the pipe to the muffler, the pipe just sits in there and rattles around the way it was installed originally.With our muffler rebuild complete the muffler can be bolted in place and the cotter pins installed.The deflector went back on after a trip to the buffer wheel. No doubt it will look crusty again in a hundred miles.
We started the car after our muffler rebuild and were rewarded with a much quieter car. Unfortunately now that the exhaust is not so noisy out the back we are able to hear a little leakage at the exhaust manifold under the hood. No good deed goes unpunished!
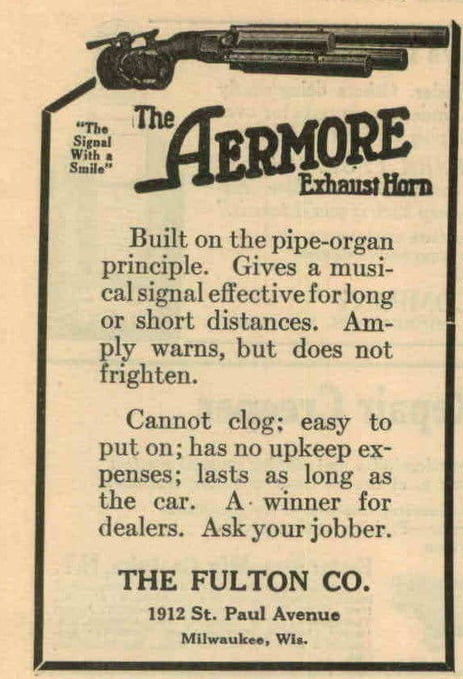
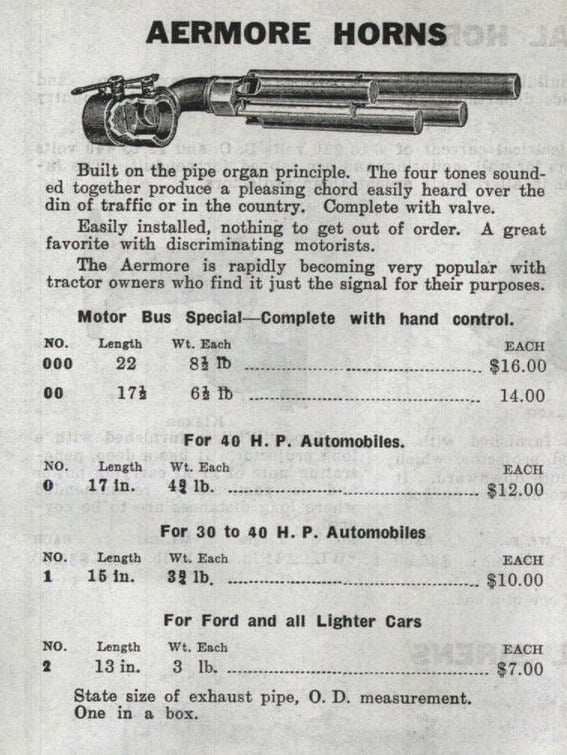
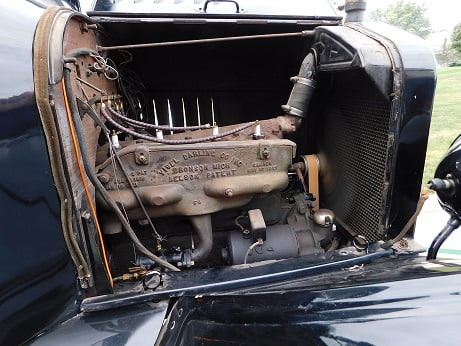
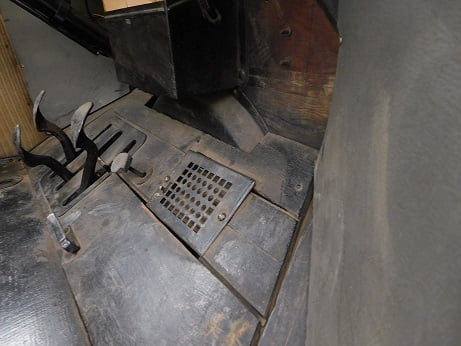
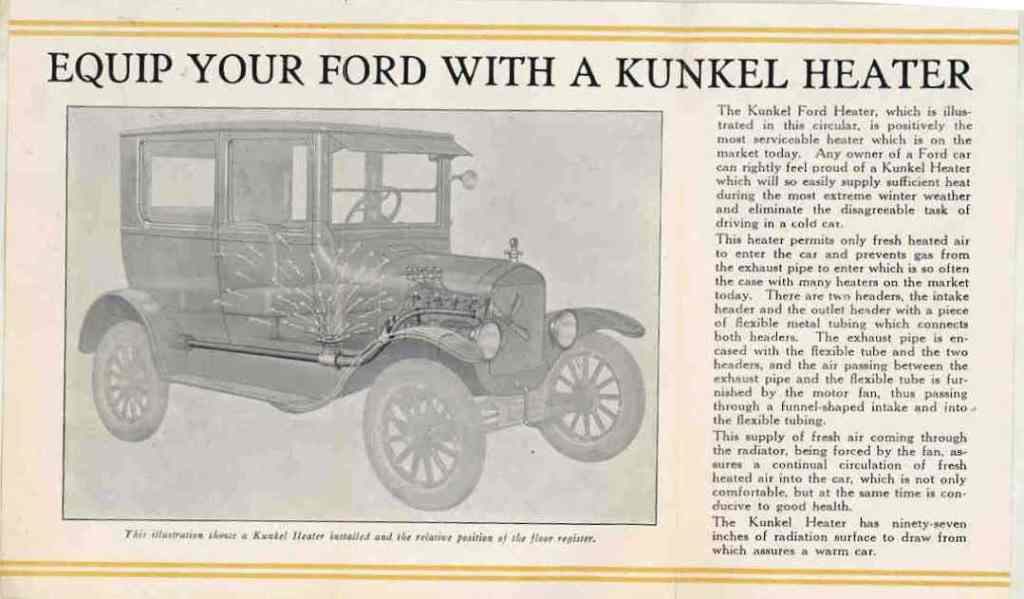
Aermore exhaust whistles were made by the Fulton Company. They were popular accessories for the Model T Ford then and now.Aermore horns came in a variety of sizes depending on how big your car was.Another period accessory was the Wilmo exhaust manifold. It combined the intake and exhaust into one unit. Of course huge gains in economy and performance were claimed!In the winter months a heater is not a bad thing to have in your Model T Ford. This car was seen at an Ohio tour sporting an aftermarket heater that was quite ingenious. It uses air from the fan, heated by the exhaust manifold.A lever on the driver side of a floor grate is used to control the heater. It can be closed off during warm weather.The Kunkel heater was similar except the hot air came out further to the rear.