

Ford used clincher tires on the Model T Ford from the first 1909 passenger car built in the fall of 1908 until the end of production on the TT truck. There is a lot to know about these tires for the person new to the hobby, and perhaps even for those of us who have been around the block a few times. Let’s examine them and see what we can learn.
Note: So called “balloon tires” were offered as an option on Model T Fords beginning about 1924 with 21″ X 4.50″ tire size. This article is not about those tires, they will be covered in a future installment.

The first Model T’s had smooth tires with no tread. The tires were made principally from natural rubber and canvas fabric. Tire technology in 1909 was not too good. In those days the natural rubber was sort of a grayish white, and tire life was short. Ford used the cheapest tires available. To save even more money the front tires were 30X3 and the rear tires were 30 X 3 1/2″ – two different sizes. The size designation is different from what we see today, but fairly easy to understand when it is explained properly.
The first number in the clincher tire size is denoted in terms of the outside diameter when fully inflated. So “30” means thirty inches outside diameter. The second number is the tire section dimension. In the case of the front tires, the section is “3”. That means the tire is both 3 inches tall; but also it is 3 inches wide. The rear tire is also 30 inches all, but it has a section dimension of 3 1/2 inches.
With the outside diameter being the same front and rear but the inside diameter different, something about the wheels has to change so that it all fits and works. To determine what size wheel would be used we simply take the tire outside diameter and subtract 2X the section width/height. For the front tires this equation looks like 30 – (3+3). For the rear tires rim size is 30 – (3 1/2 + 3 1/2).
The answers:
Front rims = 24 inch diameter if the tires are 30 X 3 size.
Rear rims = 23 inch diameter if the tires are 30 X 3 1/2 size.
Let’s also state that there were exceptions to the above. Canadian made Model T’s always had the same size tires and rims front and rear. They were equipped with 30 X 3 1/2 tires on 23 inch rims. The Canadian factory made cars for export to many areas of the world, and those Canadian export models also had the same 30 X 3 1/2″ tires front and rear.
For most of 1909 model year cars exported to England and Europe continued to be equipped the same as US market cars. Some time in mid 1909 model year a change was made, and English / European exports started to receive like – size 30 X 3 1/2 tires as did the rest of the non – USA world.
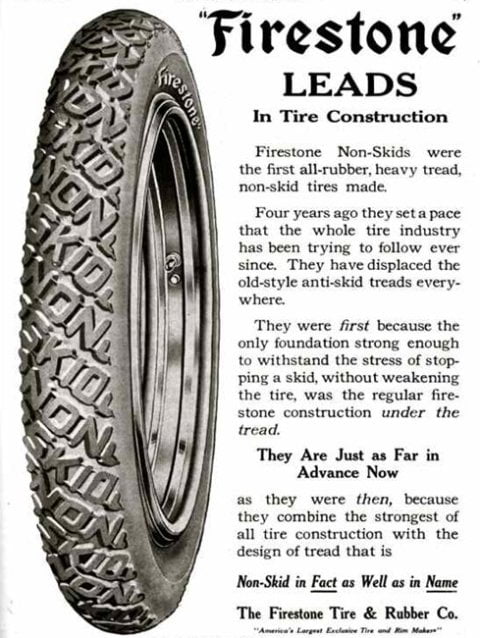
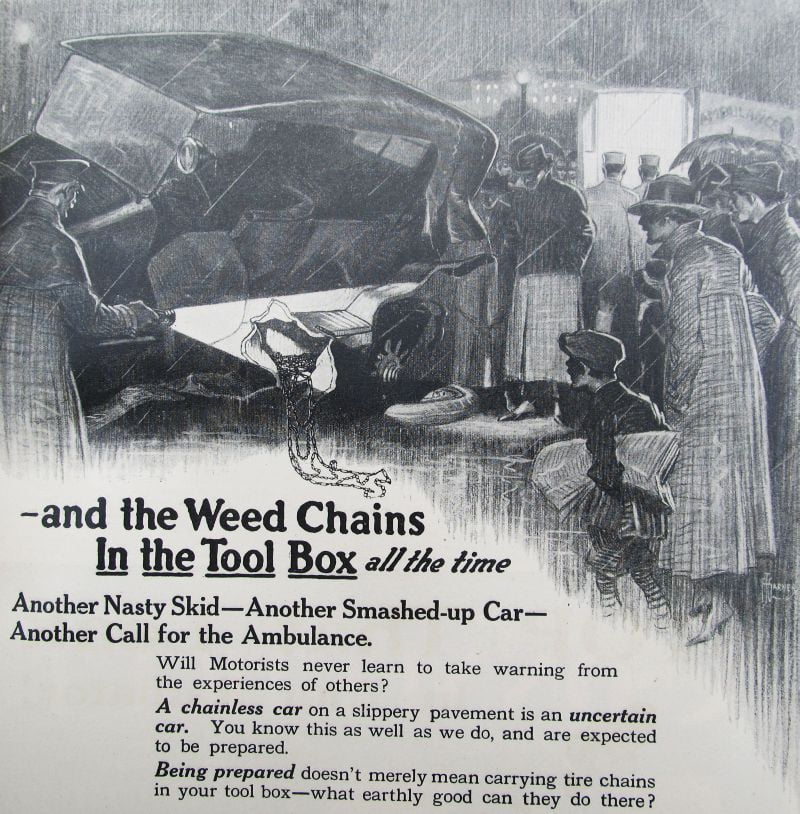
The advertisement above is from 1915. Firestone started offering its “Non Skid” tire as early as 1911. Michelin and other manufacturers had been offering treaded tires for years before that. Considering that most of the roadways in the world were dirt, there is little doubt that treads offered a big advantage, particularly on the rear wheels that provided motive force to the entire vehicle.
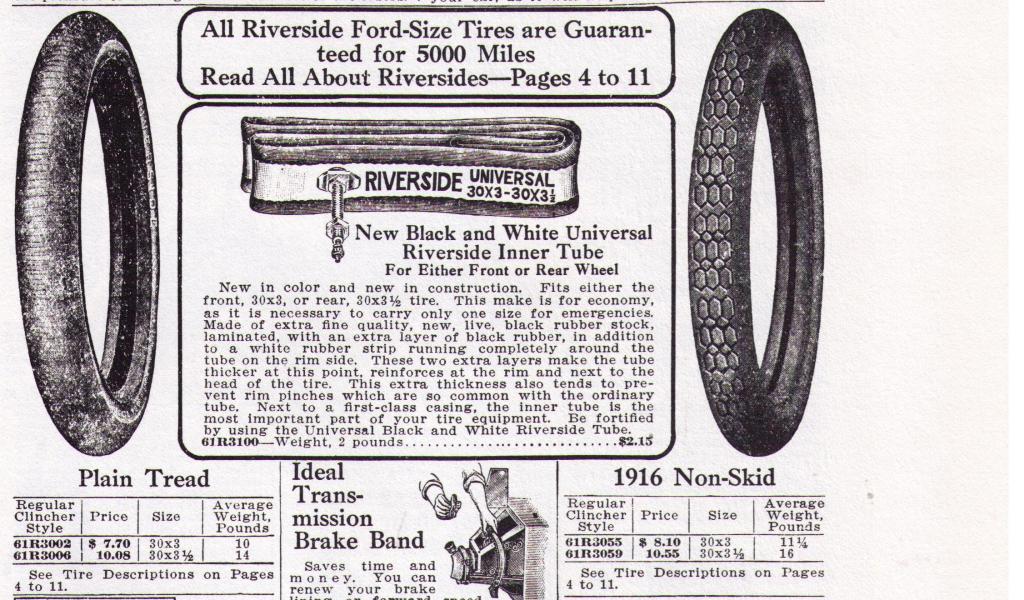
Any automotive retailer with a brain carried tires for the Model T Ford. Montgomery Wards was no exception. The photo above comes from the Montgomery Wards mail order catalog.
From 1915 until about 1985 Wards made perhaps the best Model T tires in terms of longevity. They were made of a rubber compound that seemed to never wear out. Flat tires were not any fun to fix on these stiff tires.
In the days of Model T production roads were either dusty or muddy, but they were always full of nails. The horse remained America’s favorite form of transportation until well into the 19 – teens. With 8 – 10 nails per hoof, there were nails everywhere on the roads. Ford supplied a tire repair kit with every Model T. No doubt it was a familiar thing for every T owner.
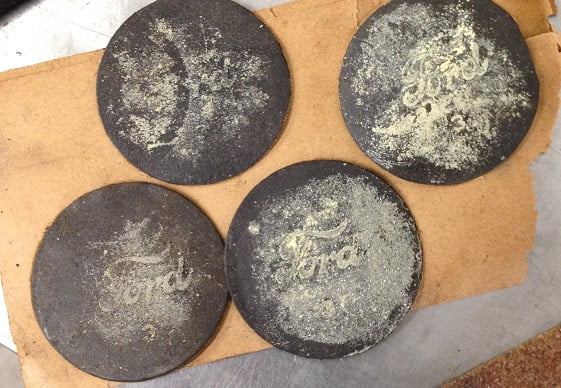
Every Model T came with a tire patch kit. Beginning in 1919 the adhesive on the patches spelled out Ford on every patch. These are hard to find today. The Model T did not come with a jack for the first few years of production. However tire tools were supplied, and they were marked with the manufacturer’s name as they came from the same supplier as the tires.
Ford offered very few factory options on the Model T Ford. One option that was available from 1909 until 1927 was Weed tire chains. Weed advertising was dramatic, but effective. Come to think of it they were right. Every car in those days had a set of tire chains under the seat.
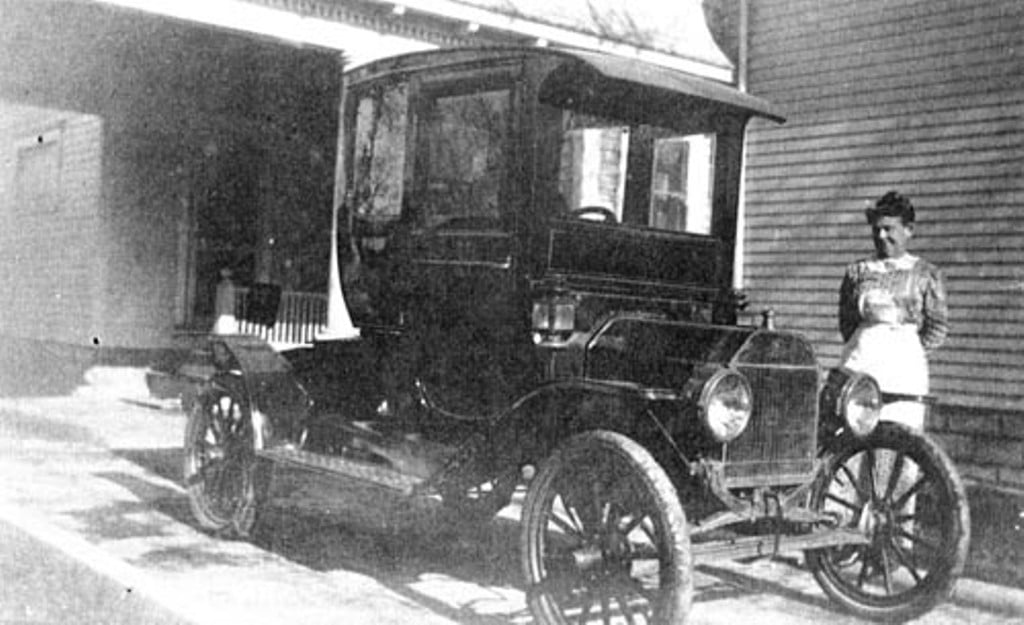
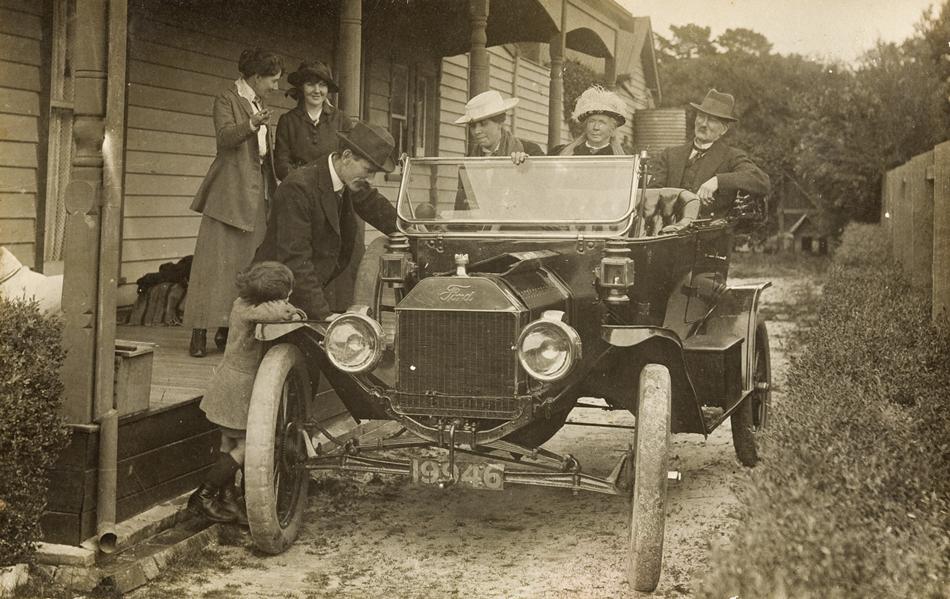
Henry Ford’s 1909 Model T Coupe
When World War 1 started in 1914 shipping raw rubber to the United States became difficult due to attacks by German ships and U boats on the high seas. Rubber was coming to the United States mostly from Ceylon (now Sri Lanka) and India, with a smaller percentage coming from Brazil. The loss of rubber supply caused an increase in the price of tires and tubes. To try to use less rubber the tire companies began to experiment with adding different things to the rubber. An additive that is the most common thing on earth – carbon – yielded not only a cheaper tire, but also a tire that lasted longer. Before long Ford began to equip his cars with the new style of tire which still had white sidewalls (both inner and outer) but the treaded area was black. The same year (1917) treaded tires were introduced as standard equipment.
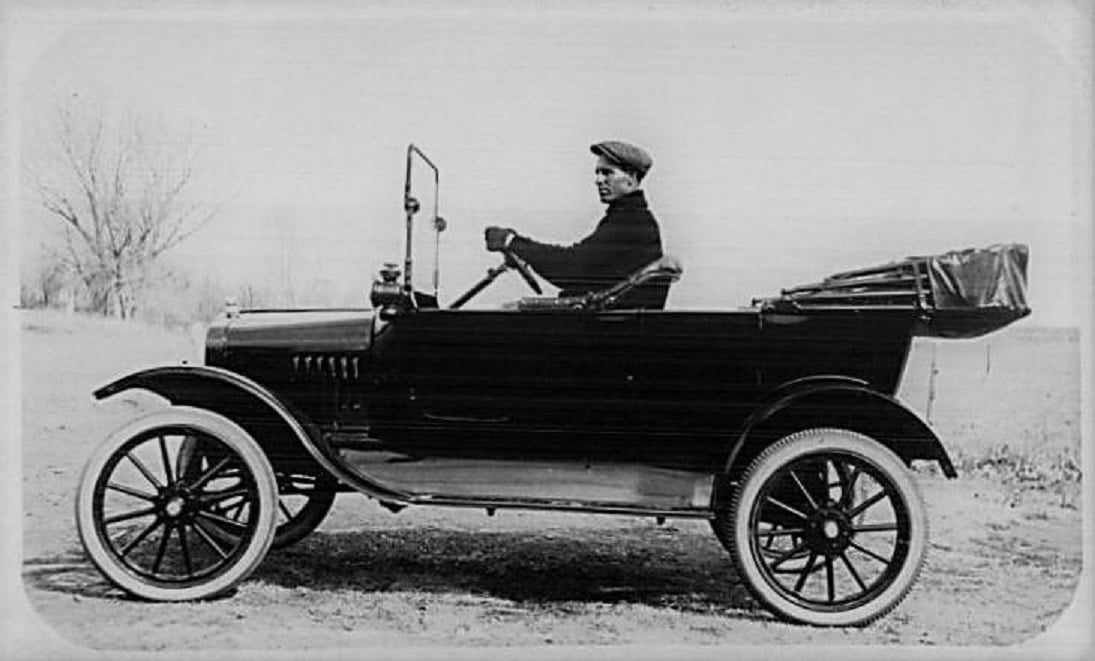
1917 touring with white inner / outer sides and black treads
Tire basics today- Let’s look at inner tubes
During Model T production all inner tubes had metal stems. They were unlike the metal valve stems that come from today’s sources of reproduction tubes. The valve stems on todays reproduction tubes are larger in diameter, so they do not fit properly through the hole in original Model T wheels. The inside diameter of the metal ferrule is too small. Even the current rubber stem tubes are too large to fit in the holes of original wheels. The wheel restoration guys use a larger sized ferrule made from 5/8″ OD copper tubing so that the new valve stems fit. Original ferrules on the valve stem hole are 1/2″ OD tubing. The ID is about 7/16″.
The Model T owner has a choice. You can either fit your wheels with bigger valve stem ferrules, or you can search out original valve stems to install in modern tubes.

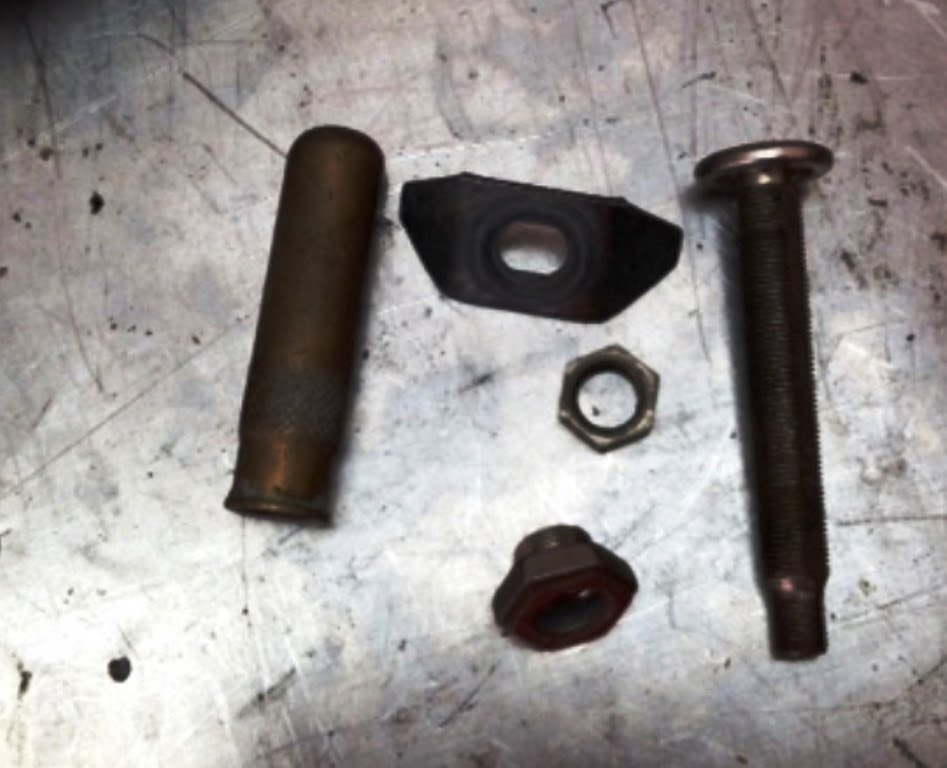
The page above shows how the parts are assembled into the tube. You start with a rubber stem tube, and cut off the stem using a razor blade, being careful not to damage the tube of course.
We picked up a shoe box full of valve stems and parts at a swap meet several years ago. Here is how the parts looked before cleaning and polishing:
A rubber stem tube is selected, this one is a 30 X 3 purchased from Coker Tire. The stem is carefully cut off with a razor blade. You cut carefully around the base of the stem right against the reinforced area of the tube. There is a piece of metal inside, you cut to the metal, and then the stem pulls out of the hole.
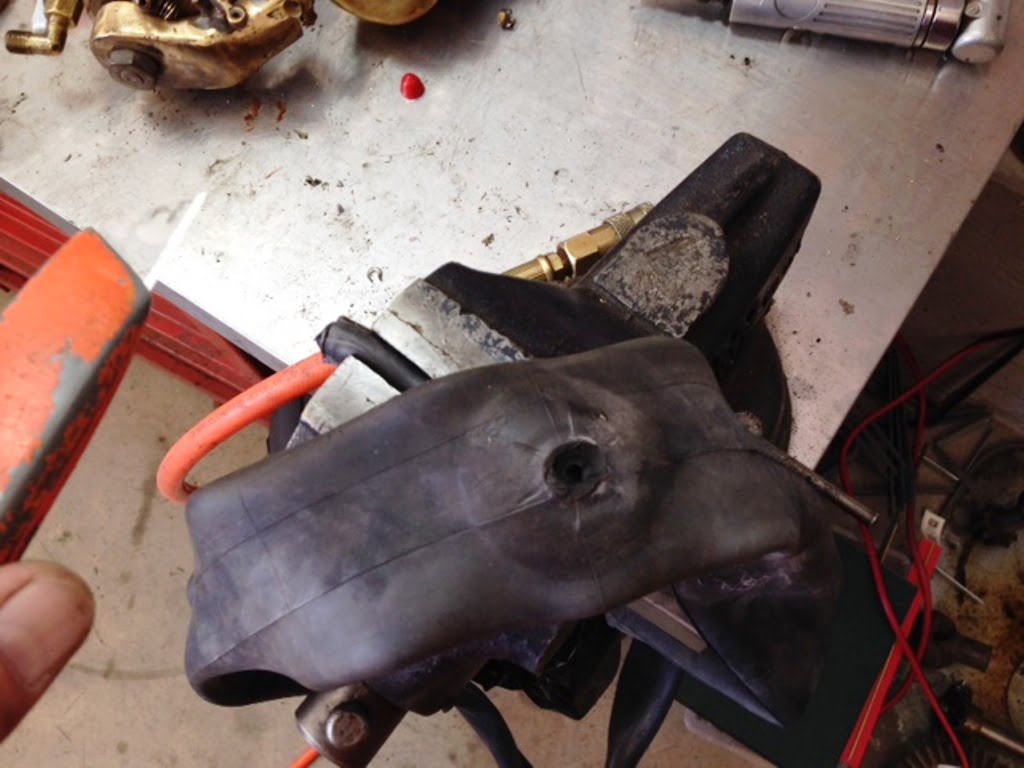
After the rubber valve stem is gone we carefully sand the area flat to ensure a good leak free seal is made when the metal stem is inserted.

The metal stem is lubed with a bit of smooth (no pumice) Go Jo hand cleaner and forced through the tiny hole in the tube. You could also use Windex or soapy water.
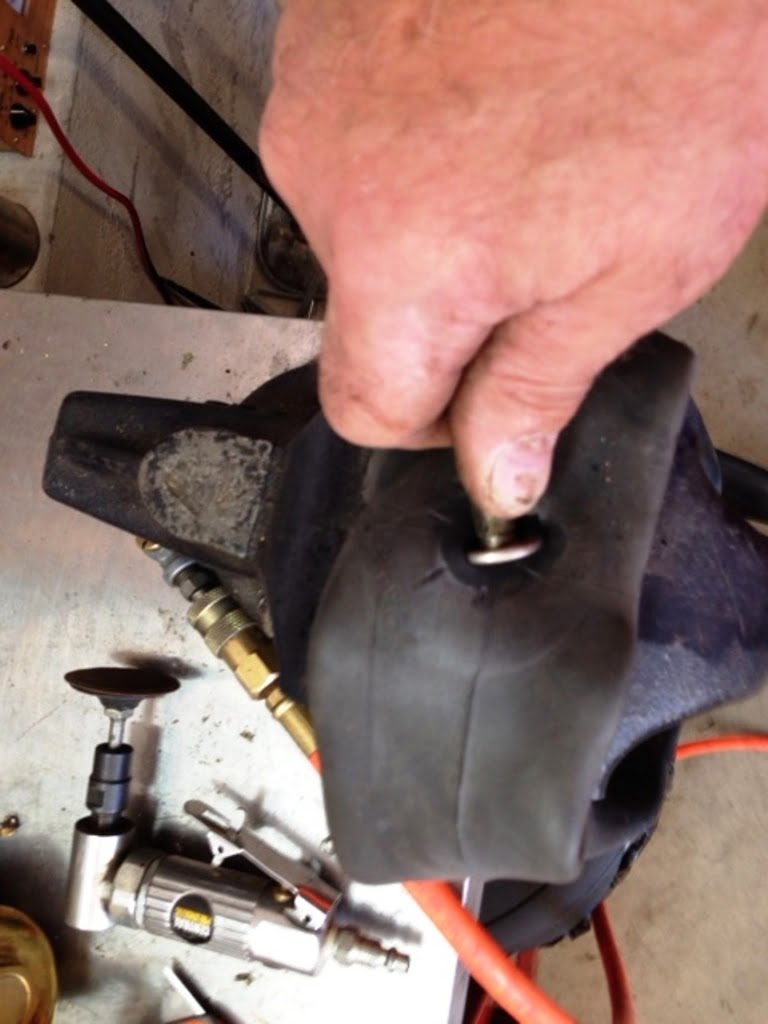
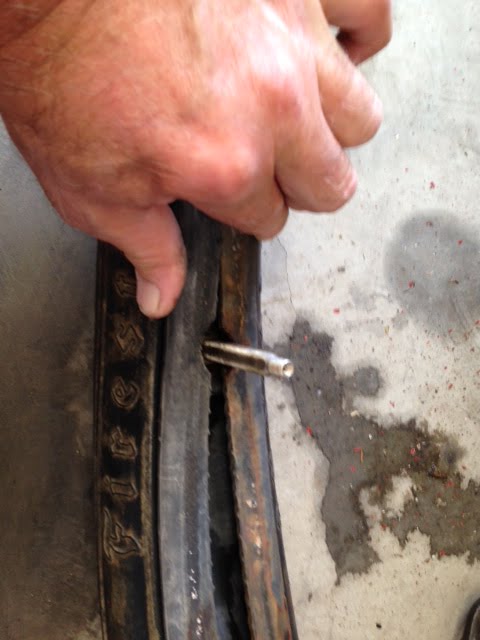
The stem is aligned so the flats on the stem are parallel with the sides of the tube. This is important so that the bridge washer aligns properly in the wheel.

Not shown, a smaller wrench is used to hold the stem so that it does not turn in the tube.
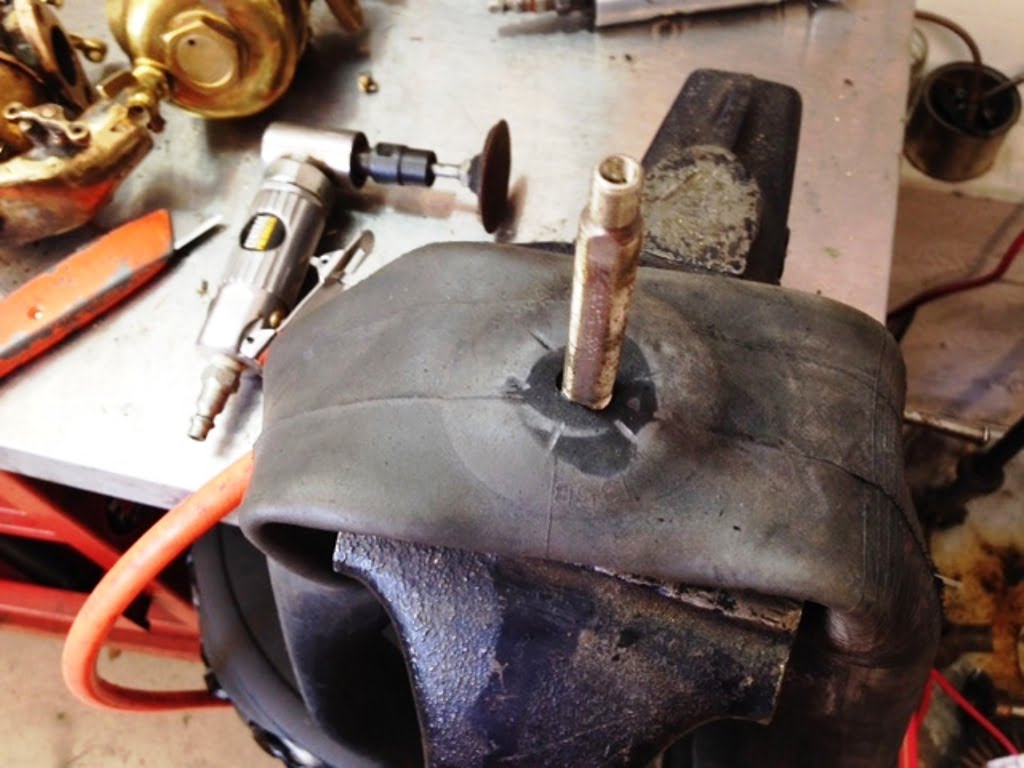
With the stem secured in the tube we inflate the tube to check for leaks. With the tube inflated Windex is sprayed around the base of the stem. No bubbles = no leaks.
The valve stems and hardware were always brass with nickle plating originally. Today’s collectors don’t generally know this; the expectation is to see it all in polished brass. This is easier than having the parts replated, and it looks great too. We polish the dust cap on the bench buffer using some green jeweler’s rouge and a sewn sisal wheel.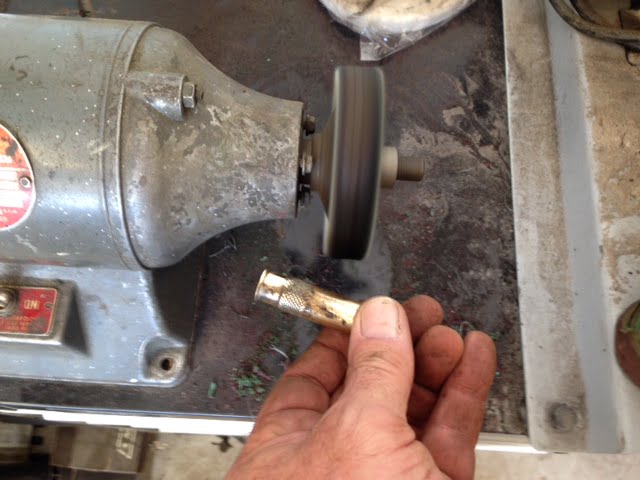
Inflation pressure is critical in clincher tires. Here are the recommended ranges for Model T Ford clincher tires:
Front 30 X 3″ tire size inflation pressure = 55 – 65 PSI
Rear30 X 3 1/2″ tire size inflation pressure = 60 – 70 PSI
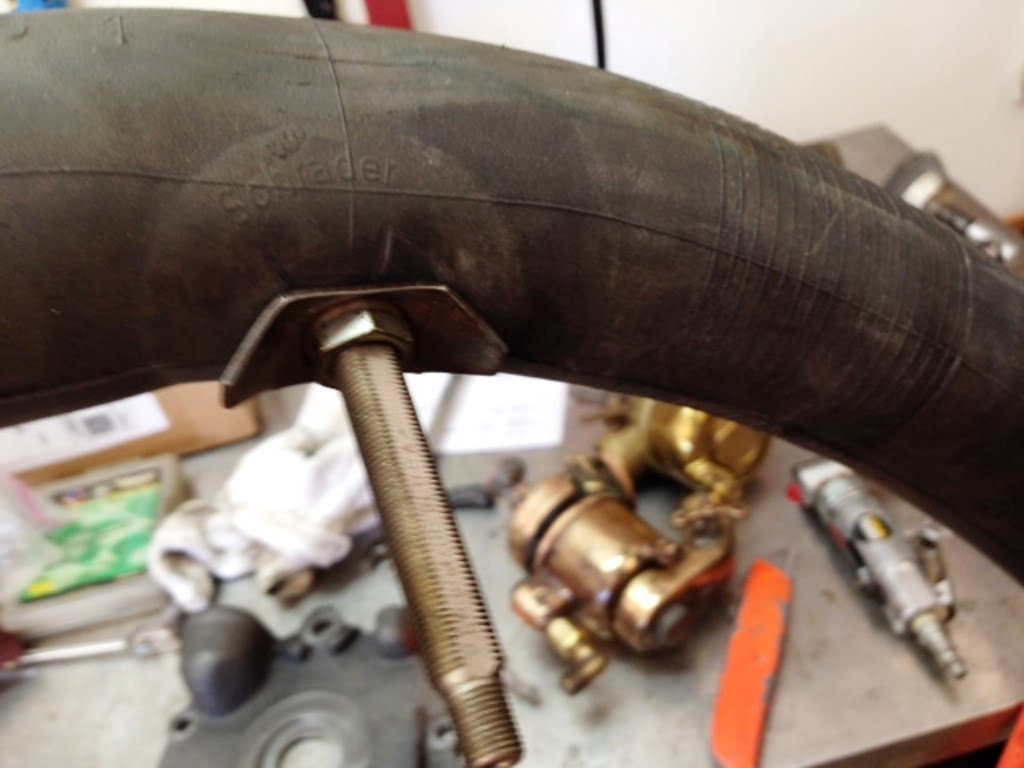
Certain tires have a very thick area that goes inside the rim. The tire shown is a Firestone diamond tread tire, it requires that a small “V” be cut in each side to allow adequate clearance for the valve stem. Without this it is virtually impossible to mount the tire to the wheel.
Tire flaps are offered by today’s reproduction tire sellers. They are expensive and they add undesirable unsprung weight to the wheel. They are made to protect the tube from puncture while mounting the tire. They offer no benefit after the tire is mounted. For the novice they may be of some value, we don’t use them. Ford built more than 15 Million Model T’s. Not one ever came with a tire flap from the factory.
Installing a new clincher tire and tube on the car is very easy once you see the right way to do it.
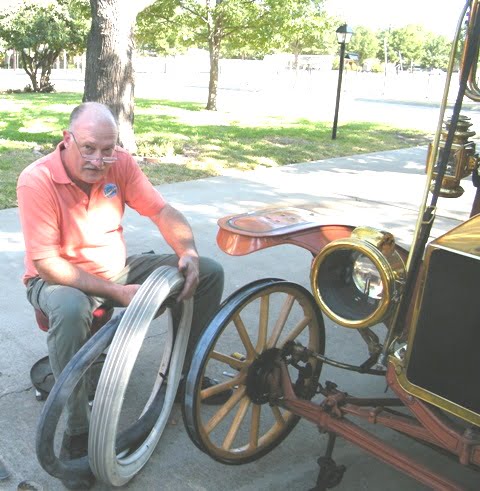
With the wheel installed on the car and the car jacked so the wheel is about 5″ off the pavement a tube is stuffed into the tire. The tube is barely inflated with just enough air to have shape all the way around. A handful of original formula Go Jo hand cleaner is used to lube the tire and the outside lip of the rim.
With the valve stem hole in the wheel at the top, the tire is stuffed between the rim and the valve stem pulled through the hole. The nut is installed finger tight to secure the valve stem. The wheel is rotated so that the valve stem is at the bottom.
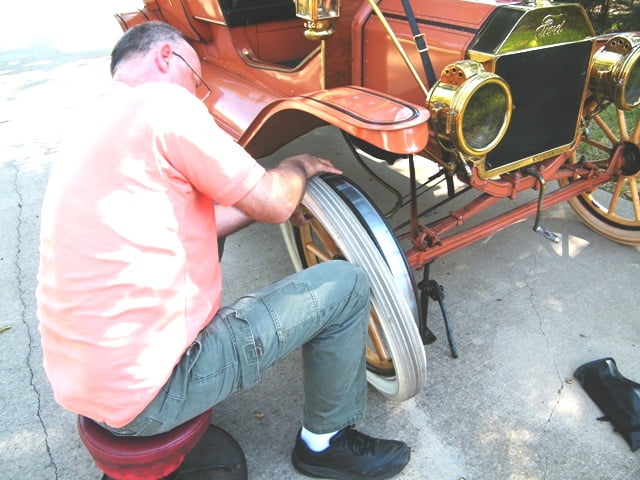
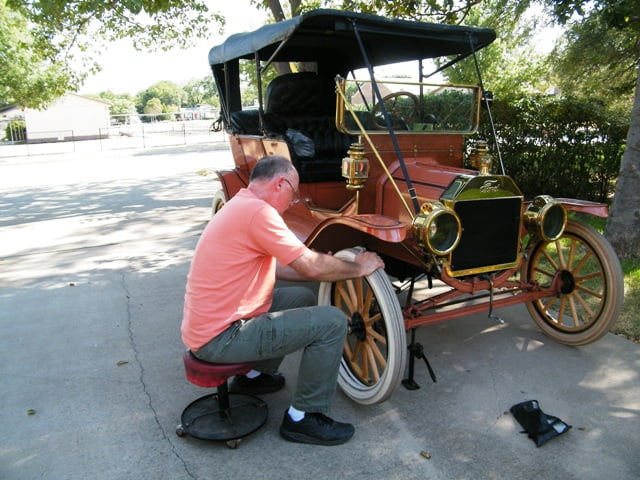
I lower the jack enough that the tire cannot escape and the wheel cannot turn. Bonus, the car cannot fall off the jack either. I had tire tools handy but never needed them. Note, to keep from scratching the rim paint wrap the tire tool in duct tape. One covering of tape lasts through the installation of one tire, or the removal of one tire. Replace the tape if it gets cut, or after each tire change.

You really can’t do this as easily without a milk stool, although I have done it on the road while on tour. Carefully I am pushing the tire onto the rim, working from bottom to top. Knees are held against one side while hands are used to push the tire over the rim.
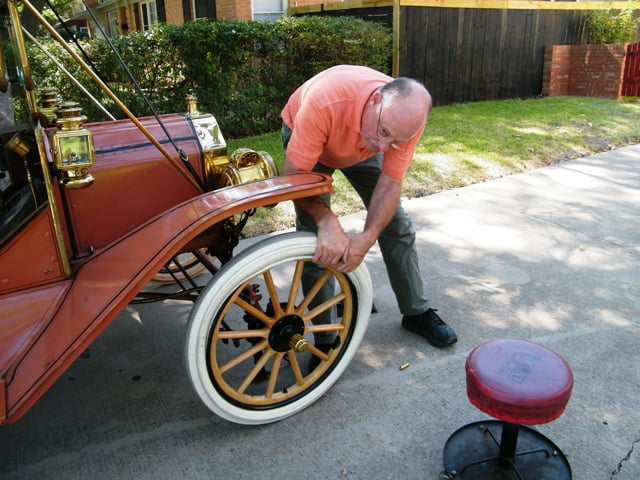
As the tire gets to the top only a little remains. I get on the other side and roll the tire onto the rim. Gloves are a good thing, I did not wear them because I did not want to get the grease from my gloves on the nice white tire.
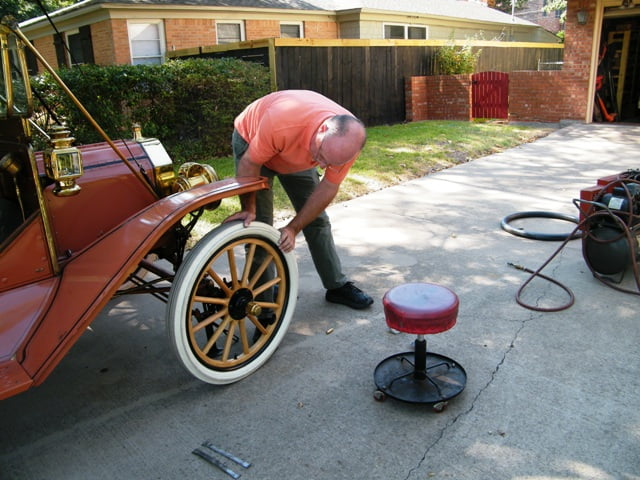
Five minutes have elapsed since the tire was lubed for installation. Dad asks “What the heck is taking so long?”
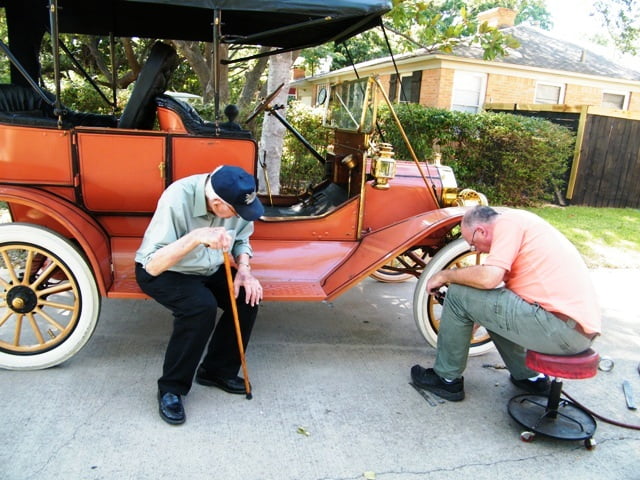
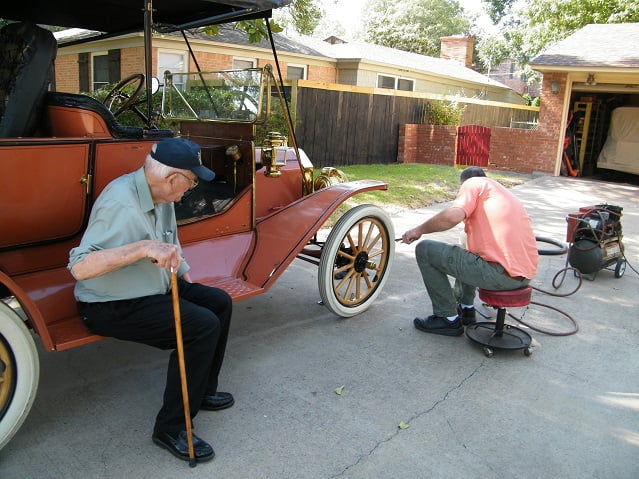
The tire is aired up to 60 PSI, the jack is put back under the rear seat, and off we went on a nice Sunday ride.